Layout Builder
A layout is a stack of elements (text, barcodes, images, boxes) each positioned within the label. Layouts are responsive: positions are fractions of the label rather than fixed measurements, so the same layout adapts when printed on a different size.
As with templates, a starter search gets you going (try QR, barcode, or package) and hovering a result renders that layout to scale so you can see what you are about to load. Starter layouts are read-only until you save a copy.
The tab also carries a Current layout JSON section holding the raw configuration.
The Layer Stack
The panel on the left lists every element in the layout. Elements later in the list are drawn on top of earlier ones.
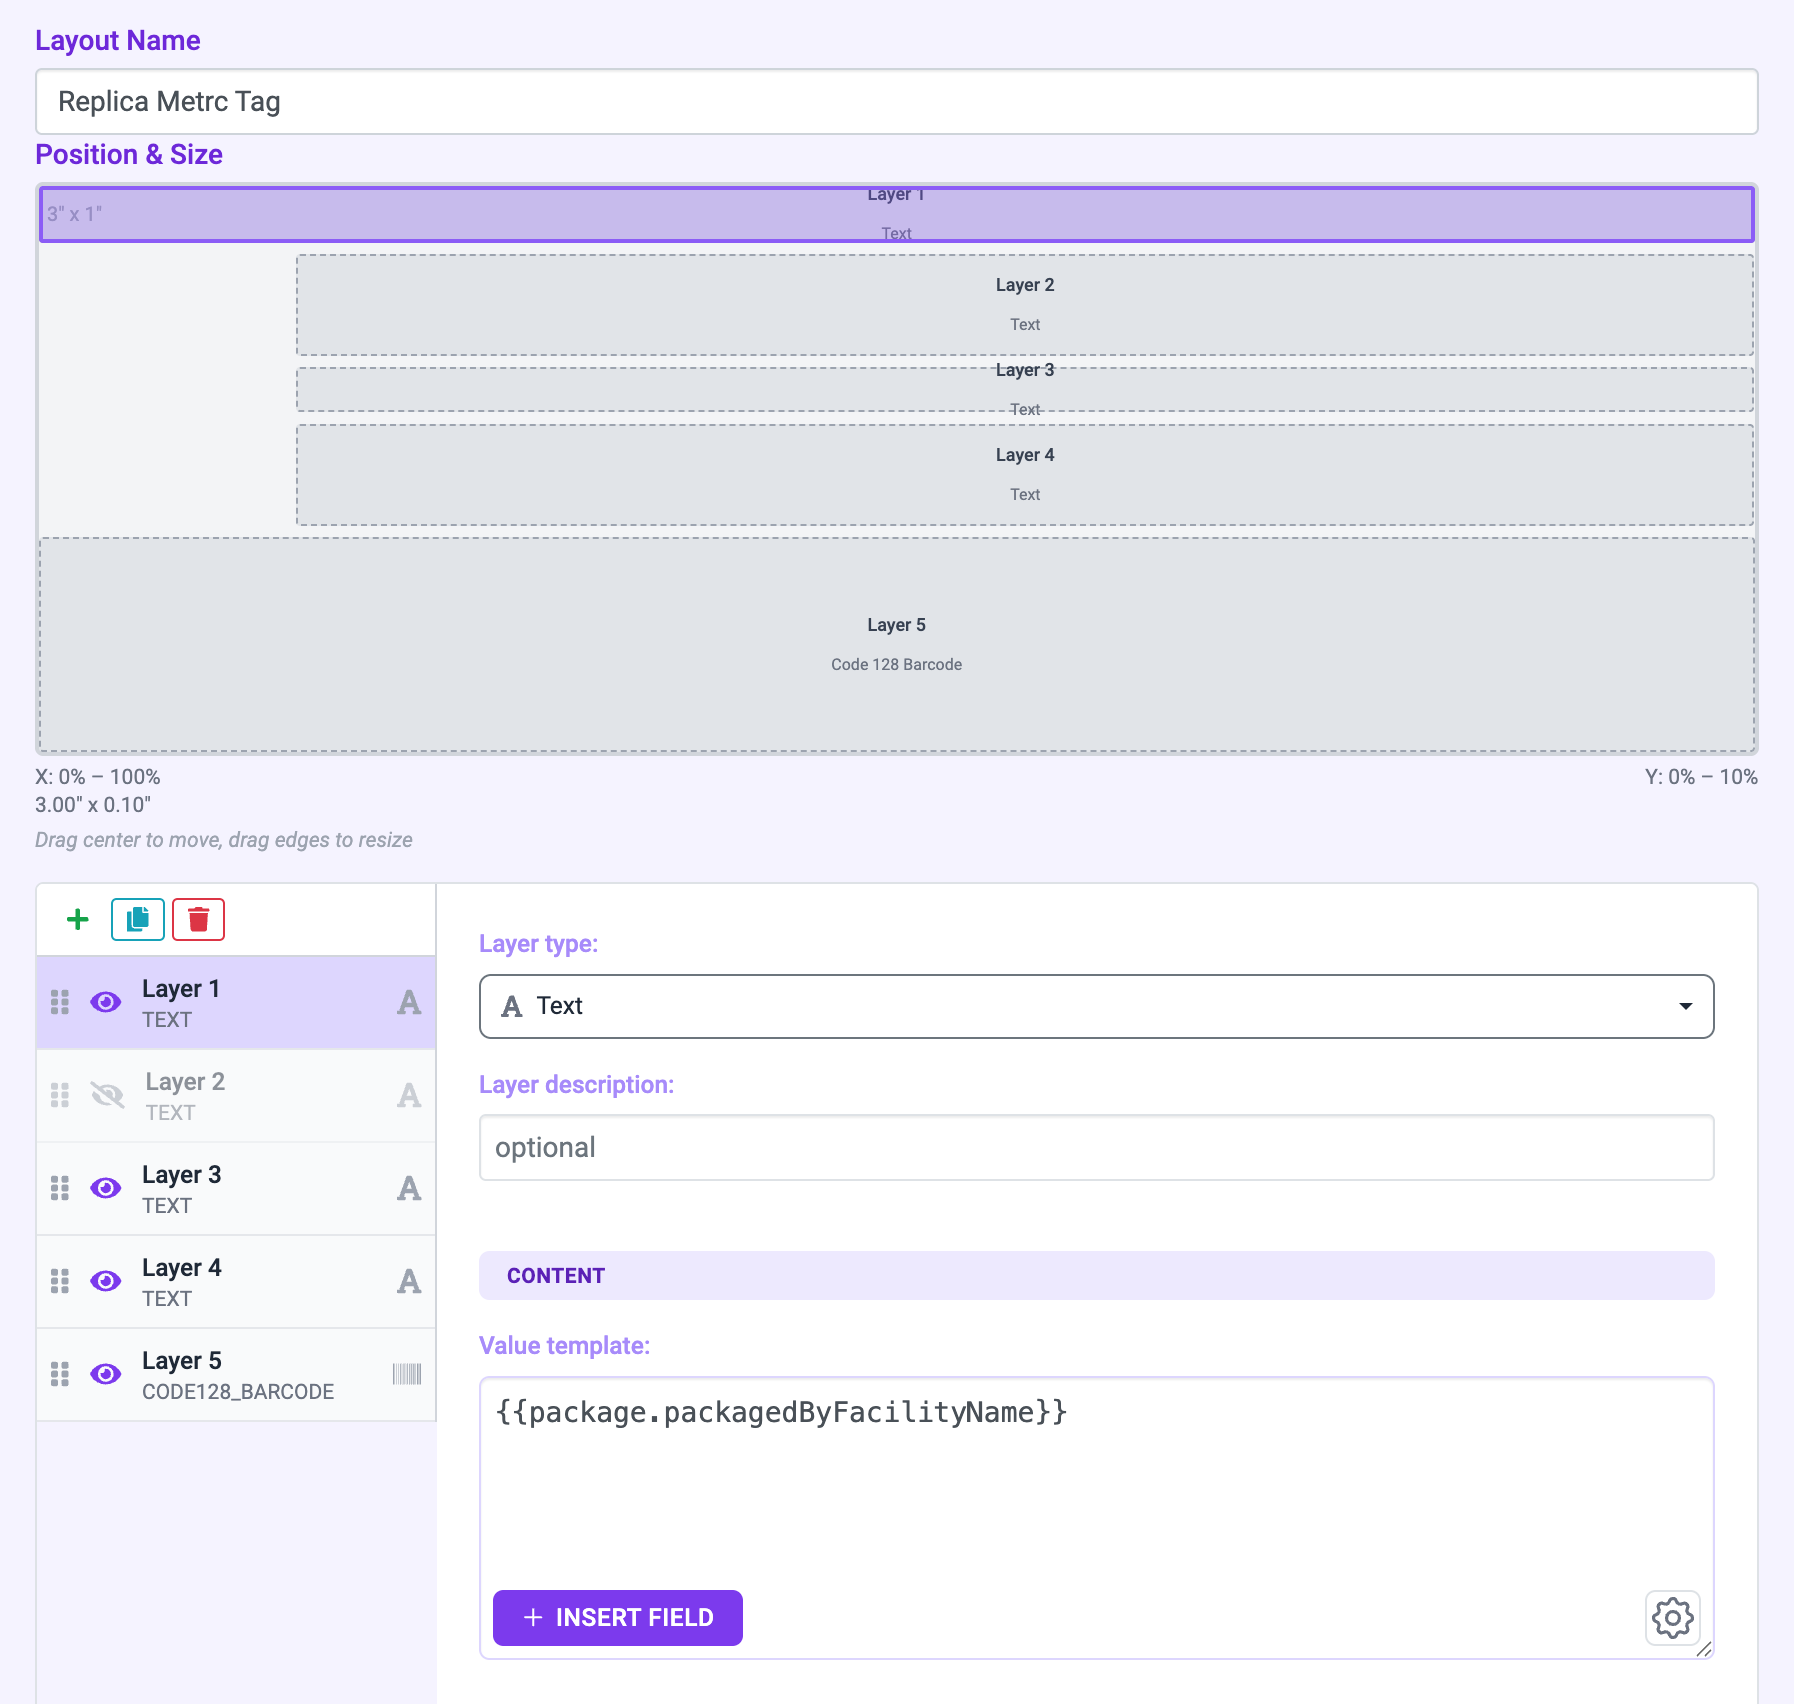
- Add a layer
- Copy, delete, and hide controls
- The grip used to reorder, which changes draw order
- A hidden layer, dimmed
| Control | What it does |
|---|---|
| + | Adds a layer. Choose the element type from the dropdown. |
| Copy | Duplicates the selected layer |
| Trash | Deletes the selected layer |
| Eye | Hides a layer without deleting it. Hidden layers are dimmed in the stack and are not printed. |
| Grip | Drag to reorder, which changes what is drawn on top |
Click any layer to edit it. Give layers a Layer description so the stack stays readable once a layout grows past a few elements, that description is the name shown here, and it is what T3 uses to name the layer in an error message.
If a layer fails to render, it is highlighted in the stack, so a failed generation points at the element that caused it.
Position and Size
Above the layer stack is a scale drawing of your label showing every element in place.
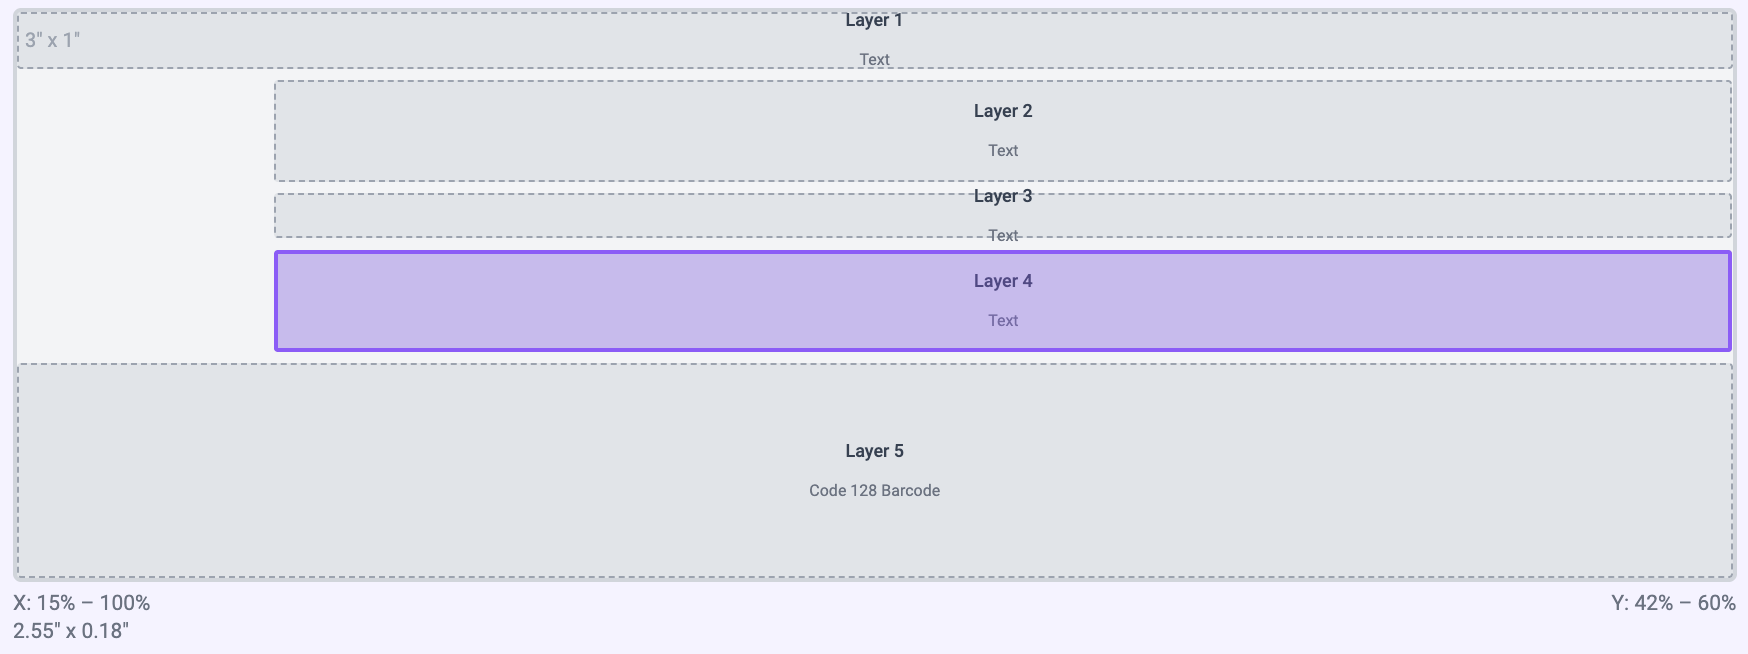
- Drag the middle of the selected element to move it.
- Drag an edge to resize it.
- Other layers are shown behind the selected one, labeled with their name and type. Click one to select it.
- Fragment layers draw their contents in place rather than as an empty rectangle, so an embedded layout is visible while you position it.
Below the canvas, the element's position is shown as percentages and its real size in inches, so you can sanity-check a design against the label you are actually printing on.
You can also type exact values using the X Start, X End, Y Start and Y End fields in the element editor. These are fractions of the printable area, shown as percentages, where Y starts at the bottom of the label.
Dragging and typing do the same thing, both write the xStartFraction / xEndFraction / yStartFraction / yEndFraction values described in Position and Sizing.
Element Types
| Type | Renders |
|---|---|
| Text | A paragraph of text, with font, size, alignment and spacing controls |
| Code 128 Barcode | A 1D barcode |
| Code 39 Barcode | An alternative 1D barcode format |
| QR Code | A scannable QR code |
| Image | An image from the Images tab or the T3 built-ins |
| Box | A rectangle, with stroke and fill color, width and opacity |
| Table | A table defined with simple HTML |
| Fragment | Another saved layout, embedded inside this one |
Each of these corresponds to an elementType in the layout config, TEXT, CODE128_BARCODE, FRAGMENT, and so on. Label Layouts documents every element type and each of its styling fields.
A new layer arrives with sensible defaults (placeholder text at a small centered Helvetica, a black hairline box, a two-cell table) so it is visible on the canvas immediately and you can position it before you write its content.
Editing a Layer
Selecting a layer opens its editor beside the stack. Which sections appear depends on the element type.
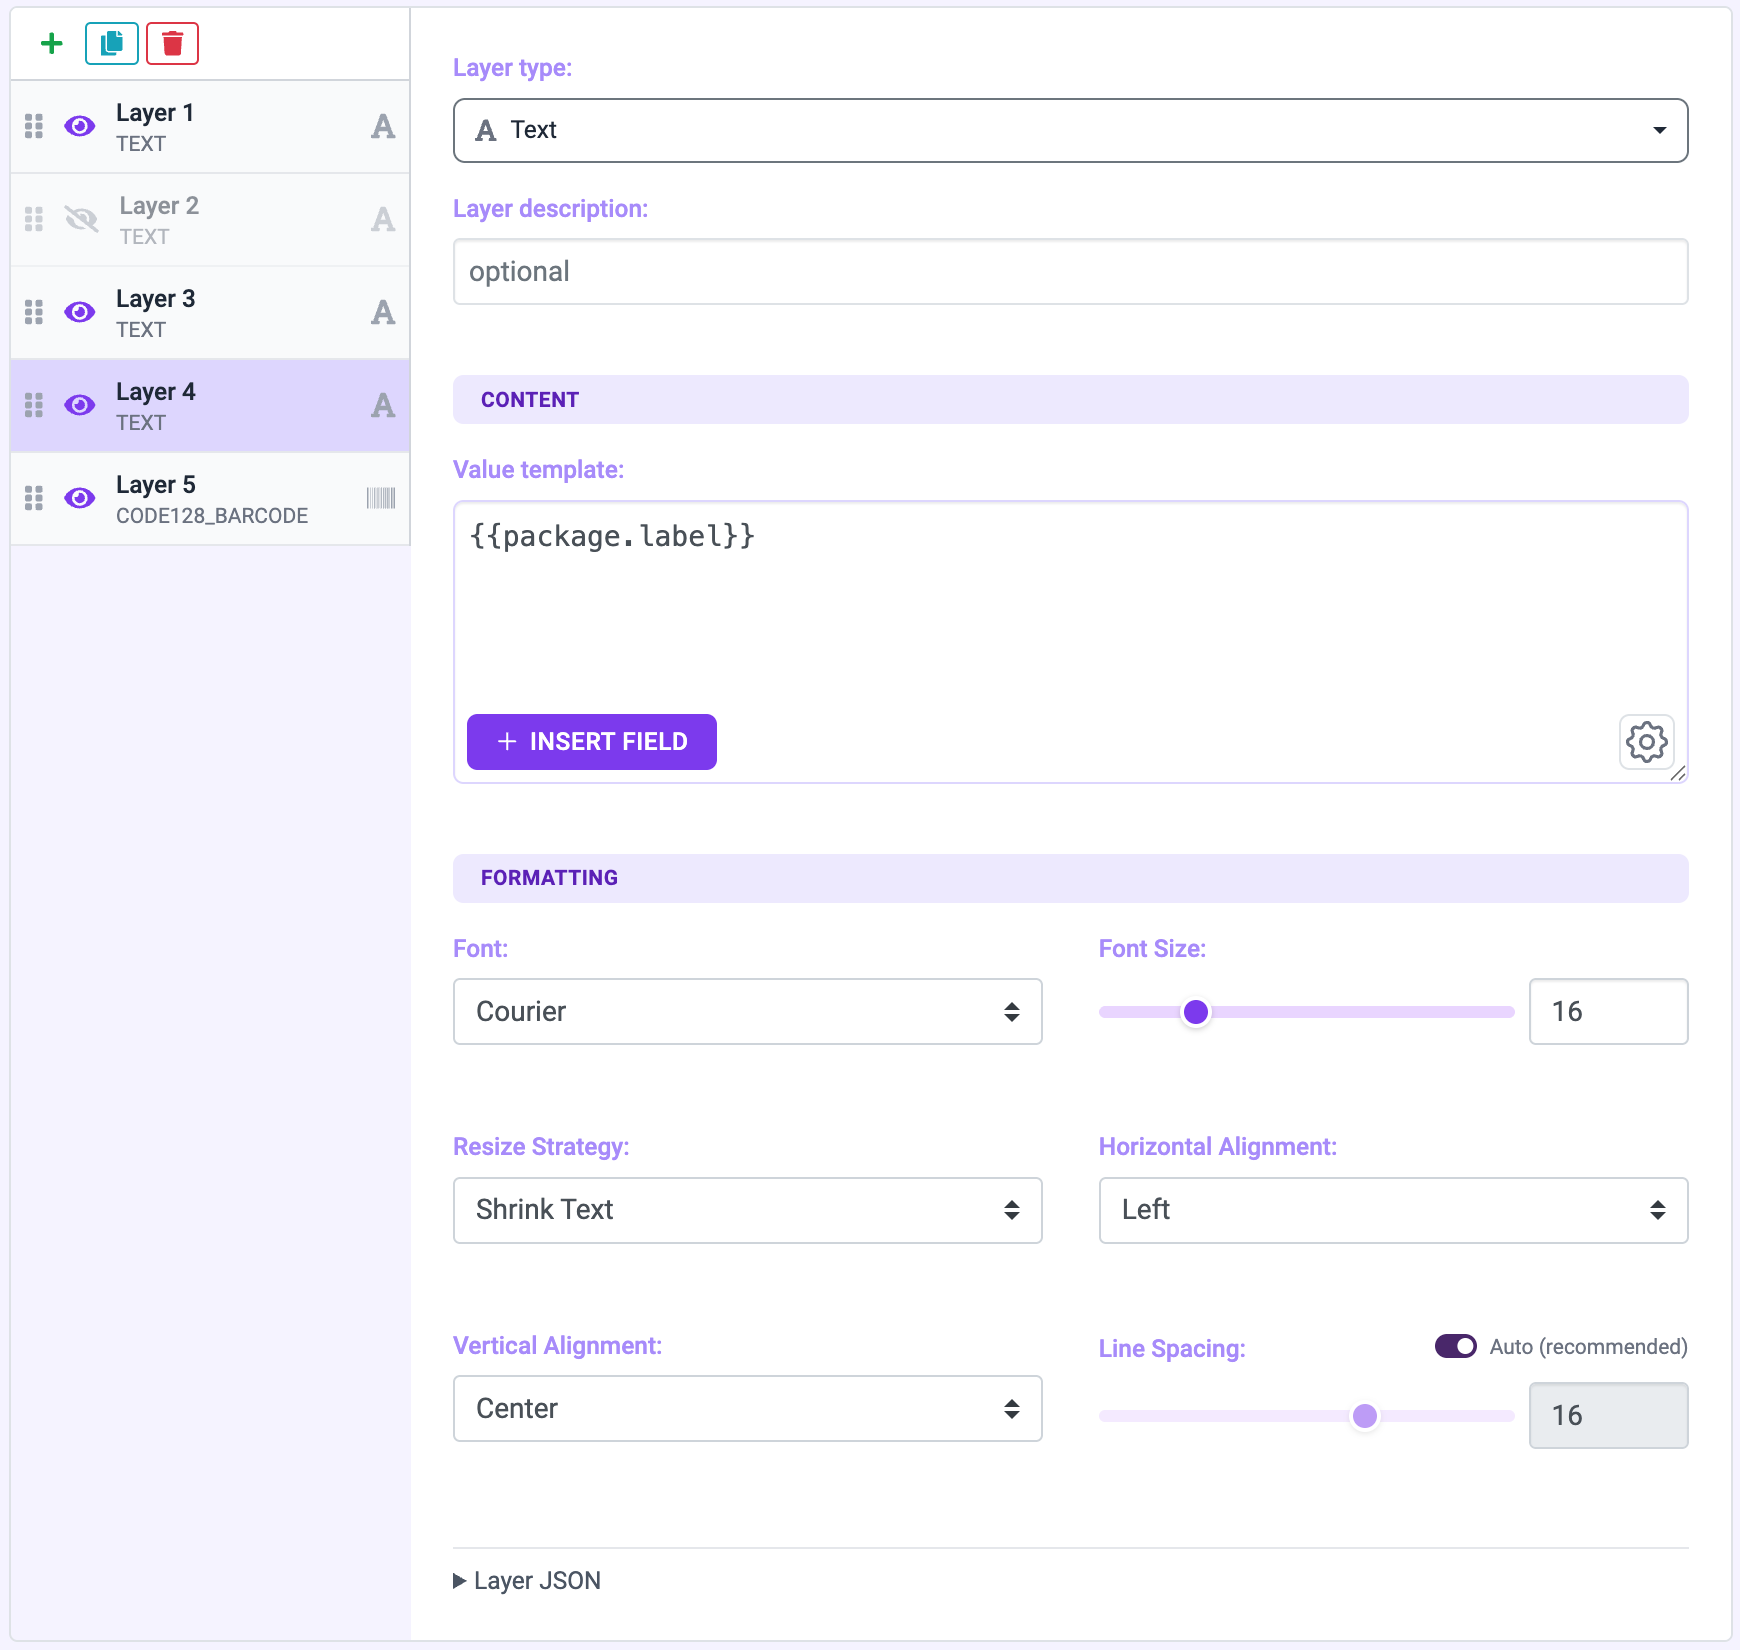
Type and description. Change the element type at any time, position is preserved, so you can swap a Code 128 barcode for a QR code without repositioning it. The description names the layer.
Content. A Value template editor holding what the element renders. It accepts Jinja templating, so {{ package.label }} prints the current record's tag rather than a fixed string. For Table elements the editor is in HTML mode.
Two buttons sit above it:
- Insert Field opens a searchable list of everything available to your templates, grouped into common fields, all fields, T3's built-in data, and your default data. Each row shows the field's path and a sample value taken from the data you have loaded. On Image layers it becomes Insert Image and lists your uploaded images and T3's built-ins instead.
- Generate Table: on Table layers, writes an HTML table skeleton of a given size into the editor so you can fill in cells rather than typing the markup.
Load your data before laying out fields
The Insert Field list is built by reading the first record in your loaded label data. With no data loaded there is nothing to list; with demo data loaded you get demo fields. Load the records you actually intend to print and the picker will show you their real field names and real values.
Formatting, on Text and Table layers: font, size, resize strategy, horizontal and vertical alignment, and line spacing. Line spacing has an Auto option that keeps it tracking the font size, which is what you want unless you are deliberately tightening a block of text.
The font dropdown offers Times-Roman, Helvetica and Courier. The renderer also supports the bold, italic and oblique variants of each, plus Symbol and ZapfDingbats, to use one, set paragraphFontName in the layer's JSON. See Text Formatting.
The resize strategy decides what happens when text does not fit:
- Allow Overflow: text may spill outside its box
- Truncate Text: text is cut off at the boundary
- Shrink Text: the font shrinks until the text fits
Box, on Box layers: border color, width and opacity in one column; background color and opacity in the other. Leave the background unset for an outline with nothing behind it.
Fragment, on Fragment layers: see below.
Every layer also has its own raw JSON section, which is the quickest way to reach a field the editor does not expose.
Fragments
A Fragment element embeds one saved layout inside another. A compliance warning panel, a barcode with its human-readable tag underneath, or a facility footer can be designed once and reused across every label that needs it.
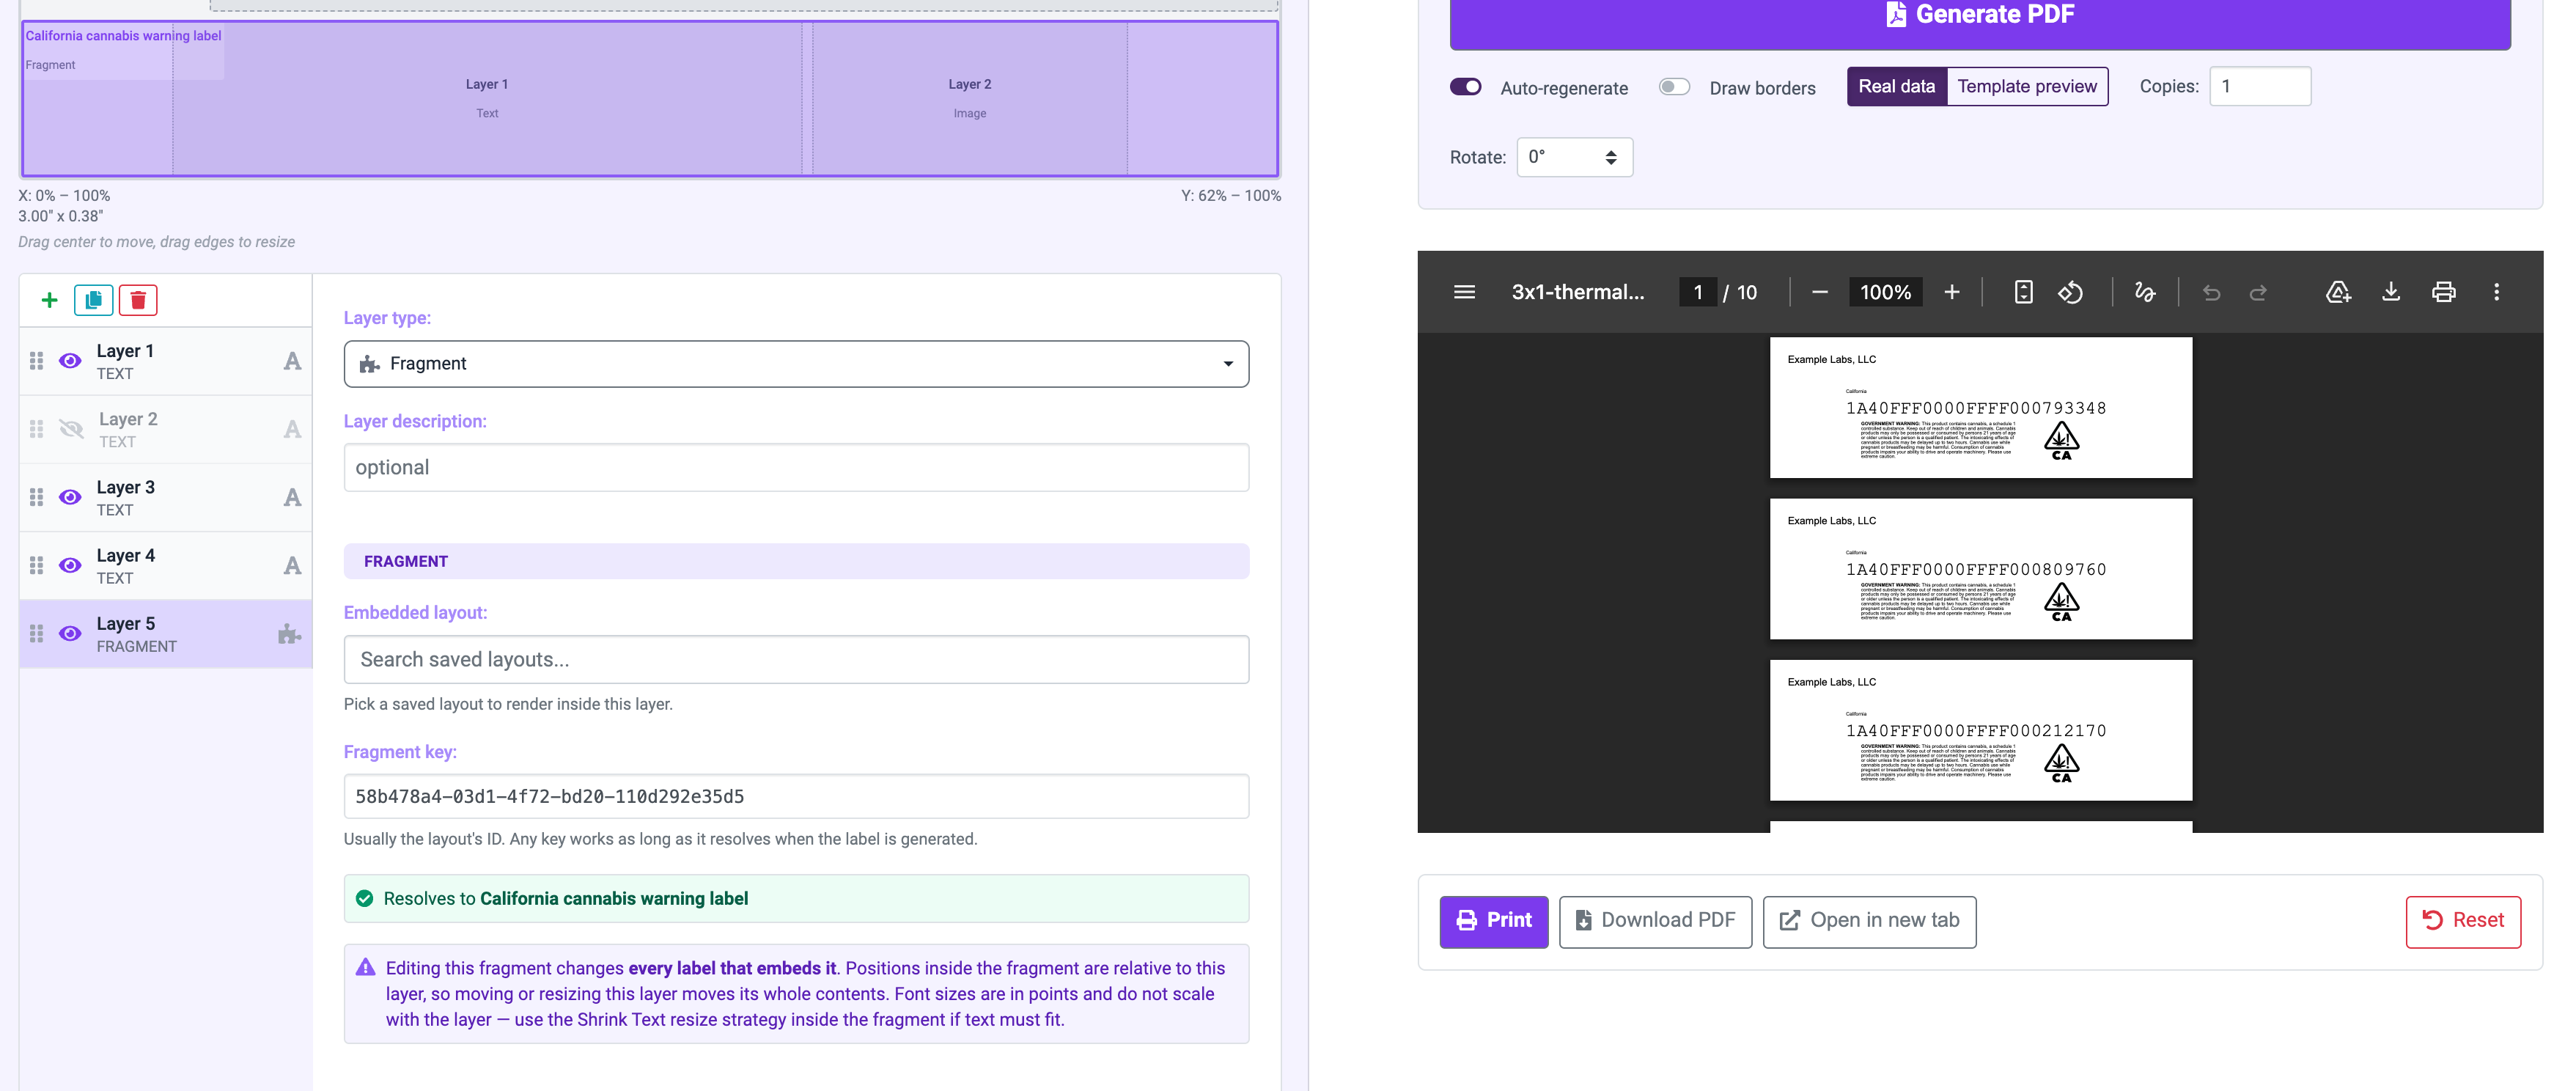
To add one, create a Fragment layer and pick a saved layout from the autocomplete. Behind the scenes a fragment is referenced by a fragment key, usually the layout's ID; picking a layout fills that in for you.
The editor tells you live whether that key will resolve:
- Resolves: the key matches a layout in this facility's catalogue, and the layout is named.
- Does not resolve: no layout in this facility has that key. It must resolve when the label is generated or the request is rejected, so this is a warning worth acting on.
- Nothing selected: the layer renders nothing until you pick a layout.
The catalogue is re-fetched before every generation, so a PDF is never built from a stale idea of which fragments exist.
Three things are worth knowing:
- Editing a fragment changes every label that embeds it. That is the point, and also the risk.
- Positions inside a fragment are relative to the fragment: not to the label. Moving or resizing the Fragment layer moves everything inside it.
- Font sizes do not scale. Text set at 10pt stays 10pt whether the fragment fills the label or sits in a narrow strip, because font sizes are absolute. Barcodes, QR codes and images do scale. If text must fit its box, set its resize strategy to Shrink Text.
Fragments can embed other fragments, up to five levels deep, though more than two levels is rarely useful. For how fragments are sent to the API, and the full list of limits, see Reusing Layouts With Fragments.
Next Steps
- Every element and styling option: Label Layouts.
- Insert Metrc values with Label Data.
- The full value syntax: Layout Element Values.