Printer: a laser, inkjet, or thermal printer. This tutorial will use a thermal printer, but as you will see, the T3 label platform can seamlessly move in between labels. The printer should be connected to your computer and have drivers installed.
Labels: thermal labels, a label sheet (like Avery labels), or even a piece of printer paper will work.
T3 Extension: install the T3 extension and login to Metrc
The following aren't strictly necessary, but if you don't have them you'll have to skip a few valuable tutorial steps: 1. Package permissions: Ability to view packages for a Metrc license. 2. T3+ subscription: Enables you to automatically load data from the T3 API via the T3 Label Studio.
NOTE: if you don't have a T3+ subscription, your labels will render with a T3 watermark applied.
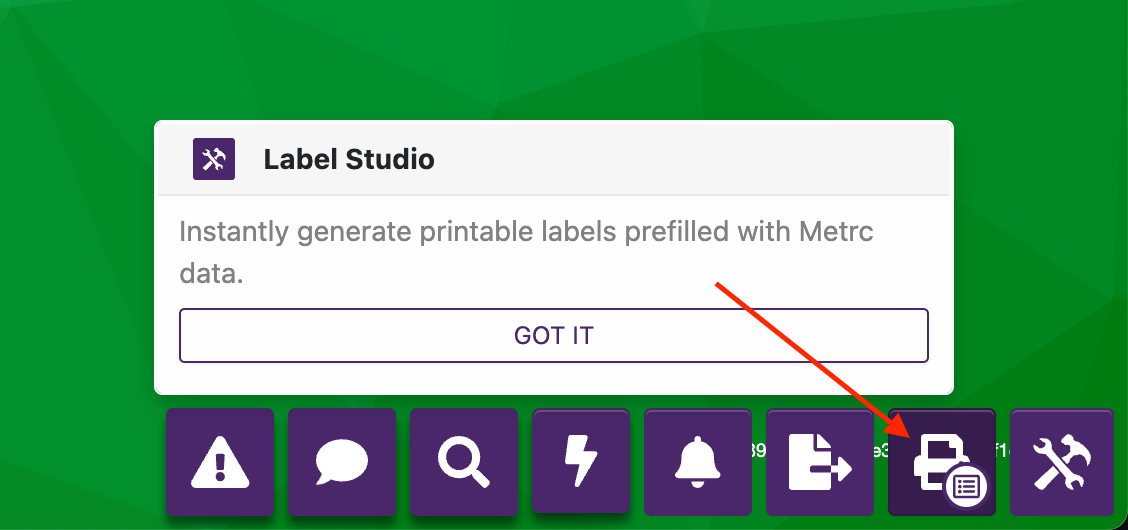
The T3 Label Studio can be accessed by clicking the T3 toolbar menu in the bottom right, shown below.
Accessing the T3 Label Studio
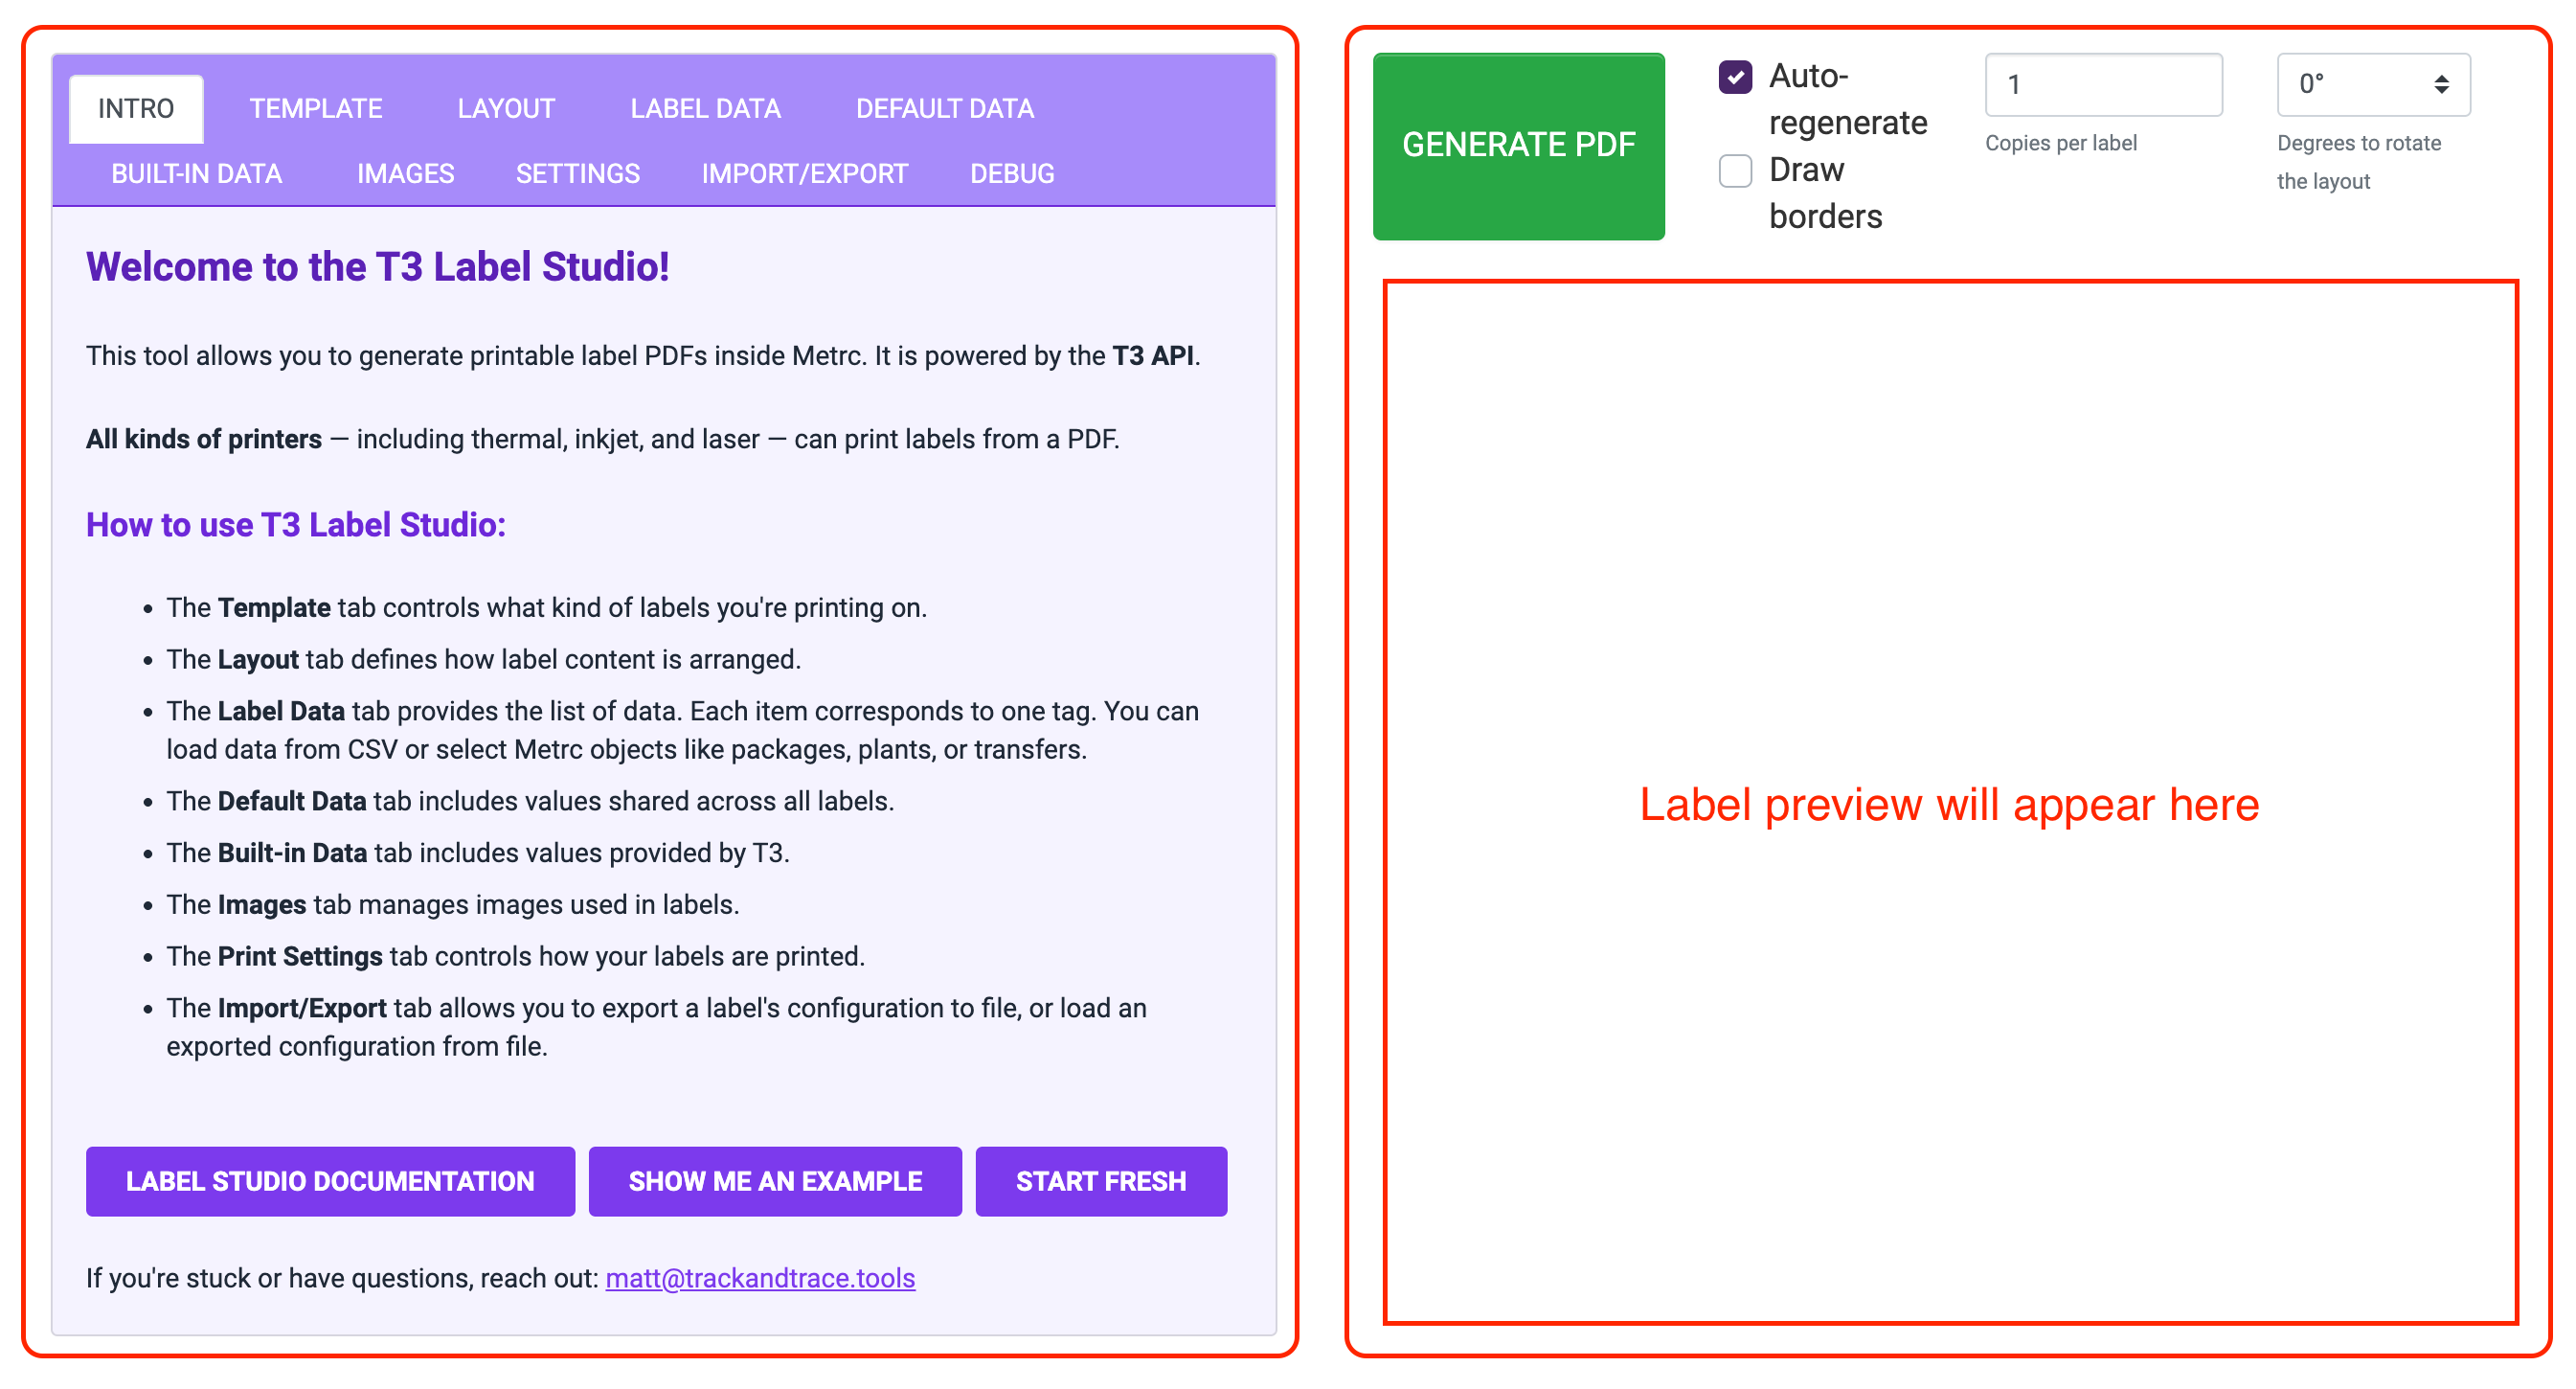
The label studio has two vertical panes. The left pane is for configuring your label, and the right pane displays the generated PDF.
T3 Label Studio panes
The left pane has multiple tabs, each of which controls a different part of your label.
The Template tab controls what kind of labels you're printing on.
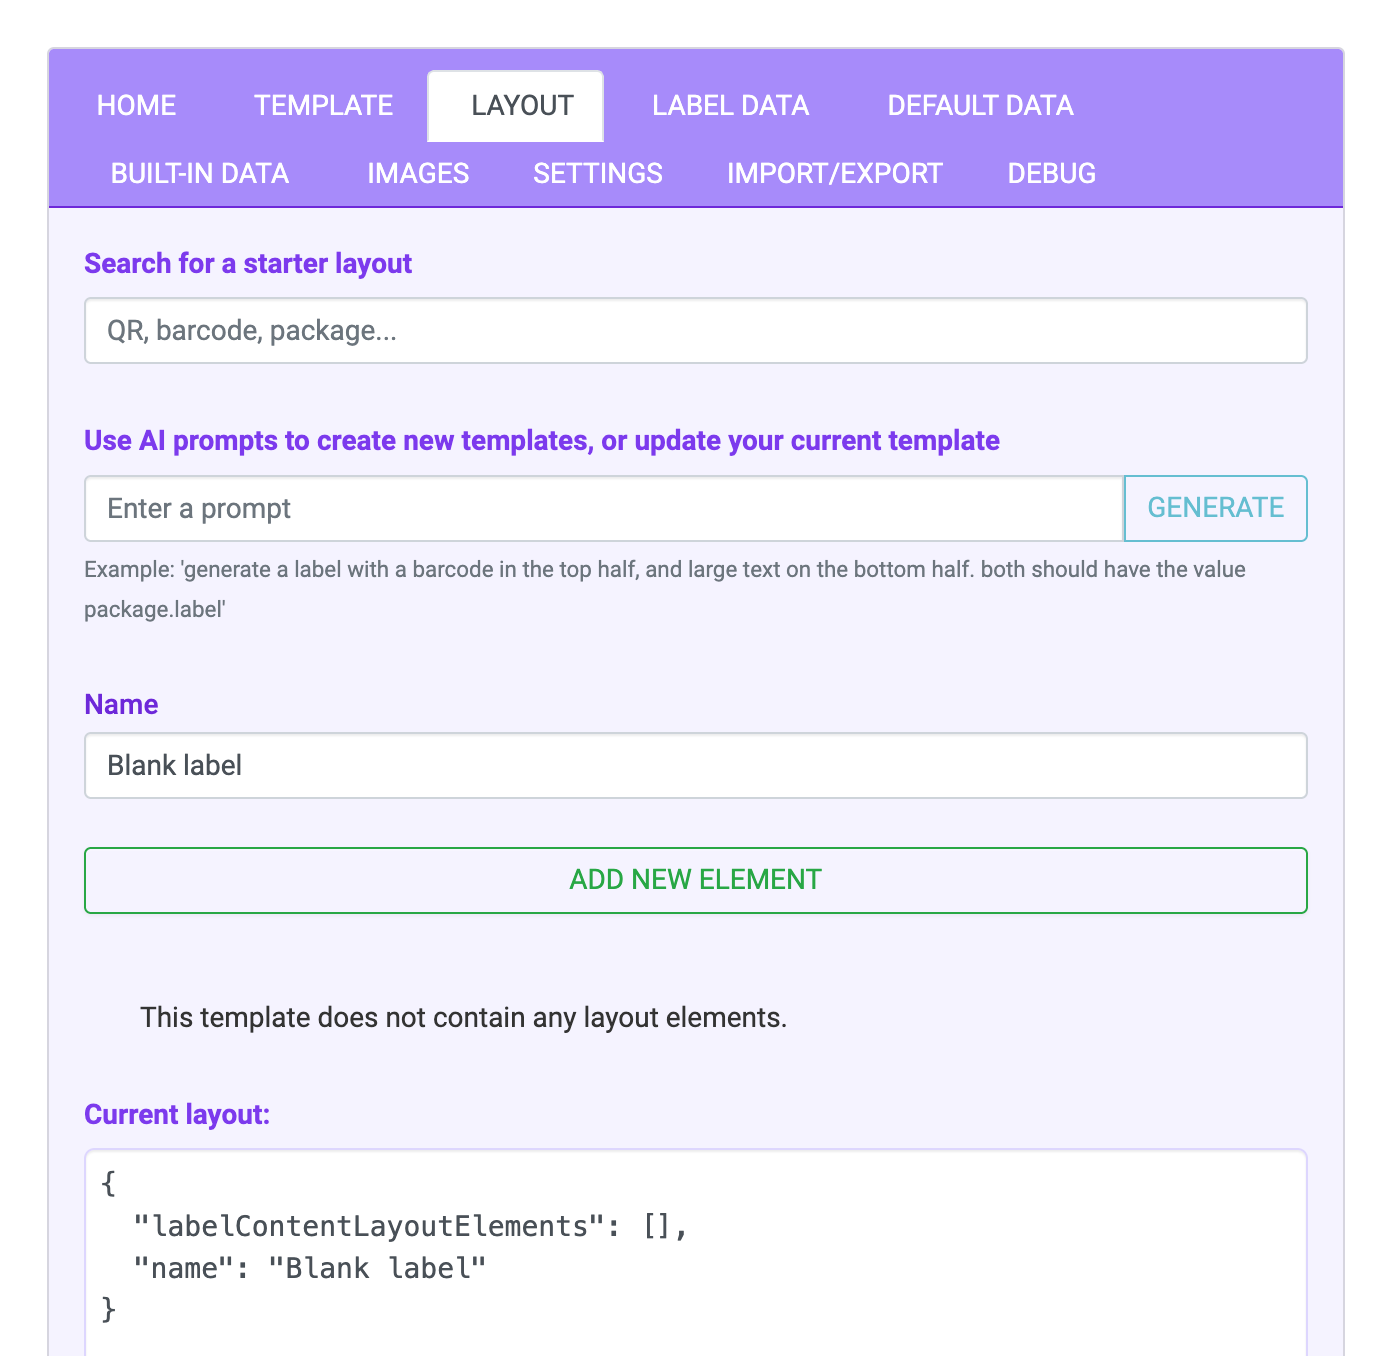
The Layout tab defines how label content is arranged.
The Label Data tab provides the list of data. Each item corresponds to one tag. You can load data from CSV or select Metrc objects like packages, plants, or transfers.
The Default Data tab includes values shared across all labels.
The Built-in Data tab includes values provided by T3.
The Images tab manages images used in labels.
The Settings tab controls how your labels are printed.
The Import/Export tab allows you to export a label's configuration to file, or load an exported configuration from file.
In general, you will be primarily using the Template, Layout, and Label Data tabs.
Click into the TEMPLATE tab to inspect the template for our 3x1 label:
3x1 template
These values control the label dimensions, the page dimensions, and the arrangement of labels on each page. The distinction between label and page can be confusing. Recall that we're printing a collection of labels:
The label is the individual rectangle, usually an adhesive sticker.
The page is how those stickers are arranged and fed into the printer.
For thermal labels, the label size and the page size are the same.
For label sheets (Avery address labels, for example) a page will contain multiple labels in rows and columns. (T3 automatically breaks sets of labels into pages for you.)
For this tutorial, we're using a thermal label, so we're essentially treating the page and the label as the same thing. There are no margins, no gaps, one column, and one row.
The T3 Label Studio is an easy-to-use tool that lets users create label PDFs without needing to know how to work directly with the T3 API. (Under the hood, all labels are being generated by the T3 API.)
Throughout the label studio, you'll see a recurring pattern:
Forms and controls, which allow you to easily view and modify individual values that control label outputs
Raw data inputs, which display the data actually being sent to the API
You can use either one of these to make changes to your labels.
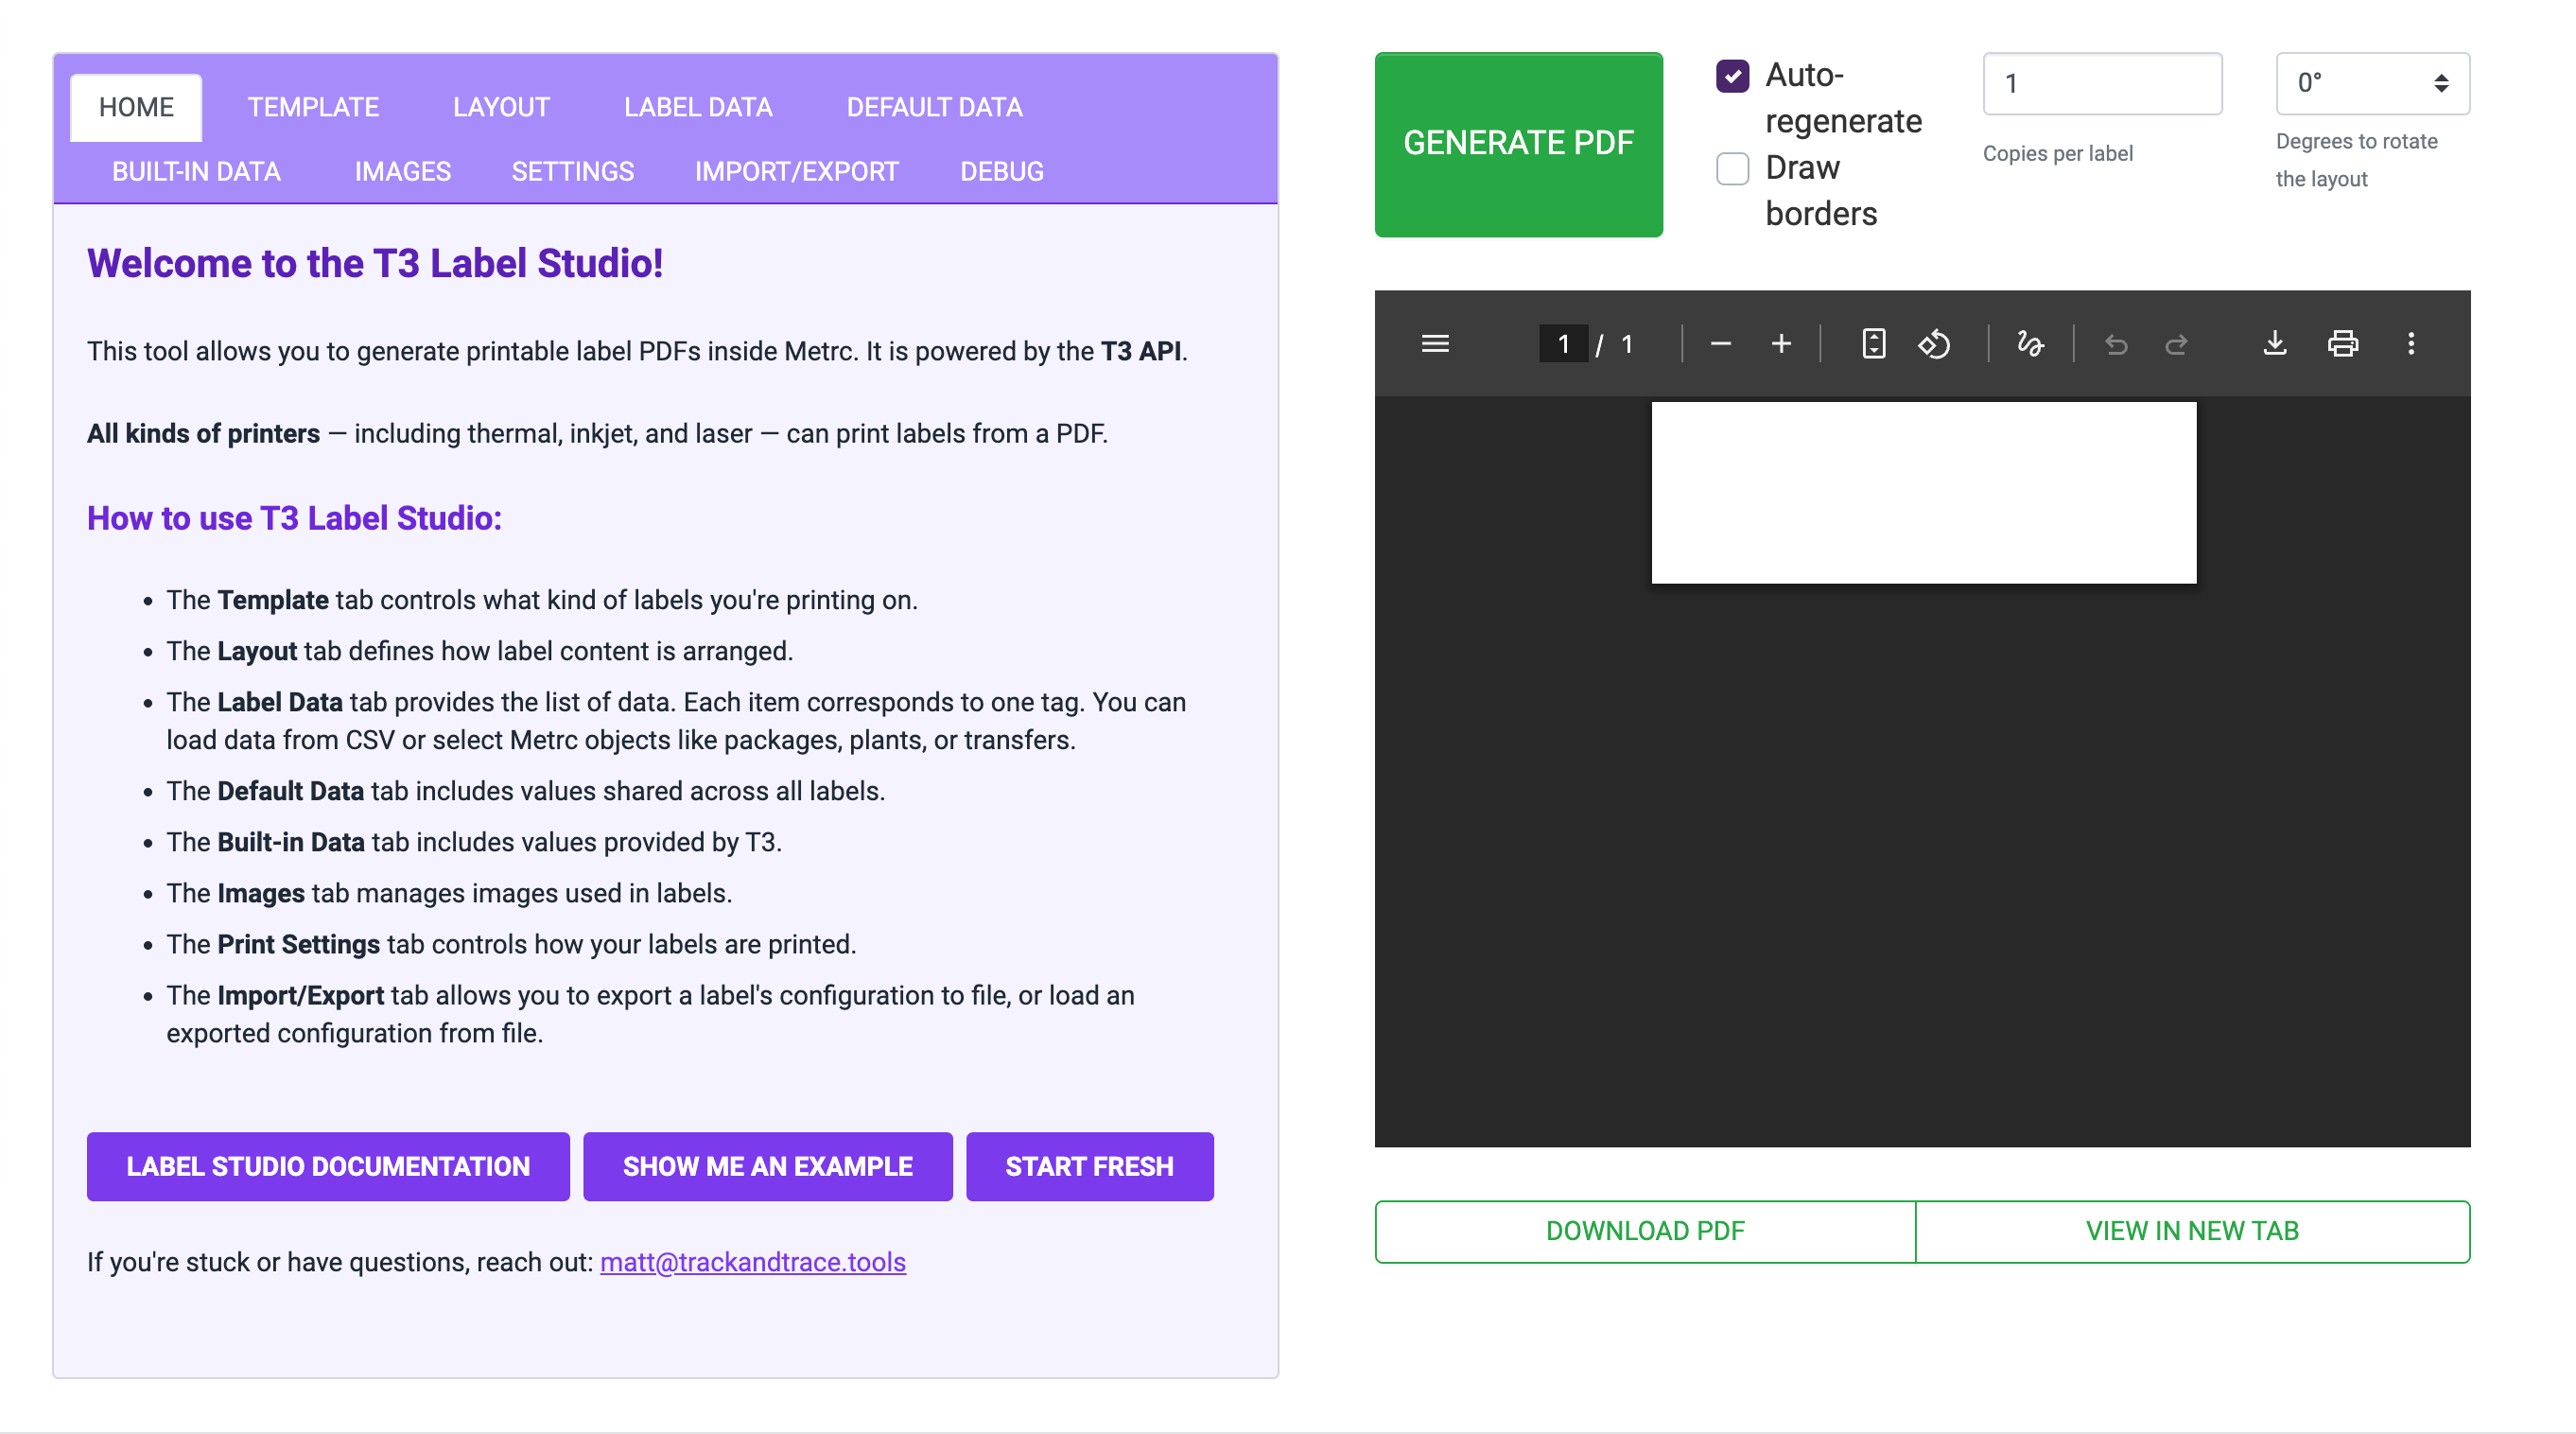
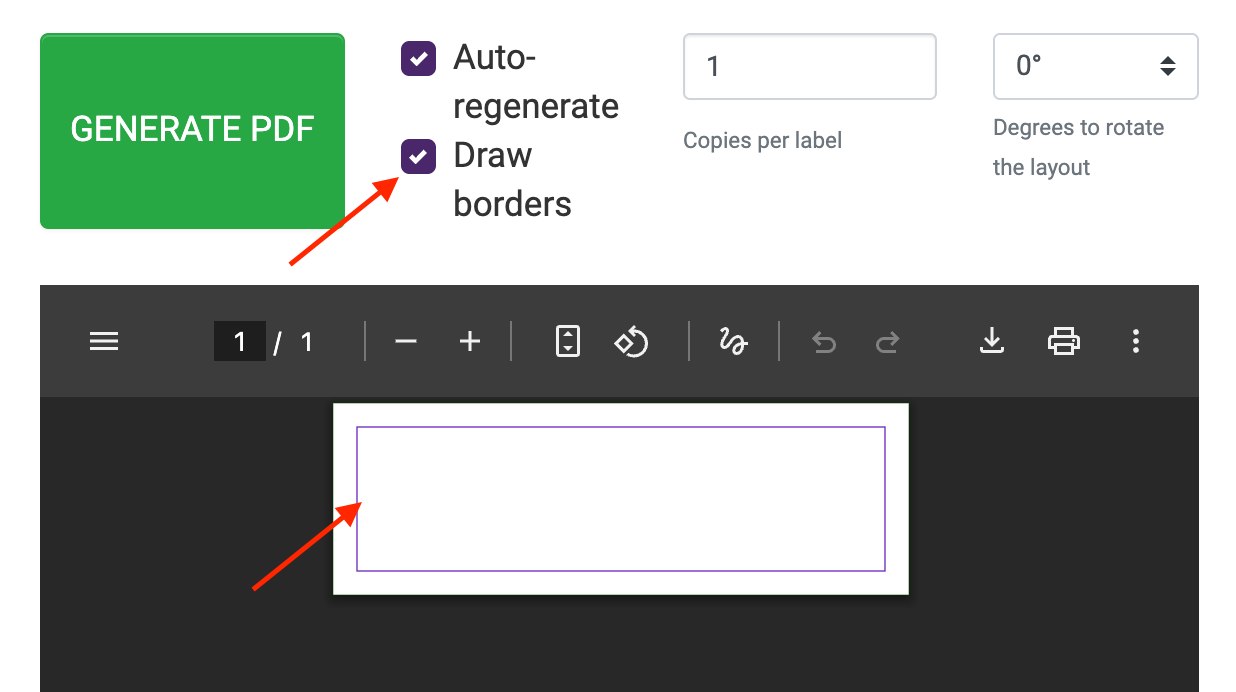
Next to the GENERATE PDF button, check the Draw borders box, and the blank label will re-render with the borders of the printable area drawn with a box.
After the PDF regenerates, you'll see the following:
Blank 3x1 label with debug borders enabled
While you're building your labels, T3 can draw the borders of everything in your label to help you visualize how everything is being laid out.
Once your label is ready, you can uncheck the box to remove the borders.
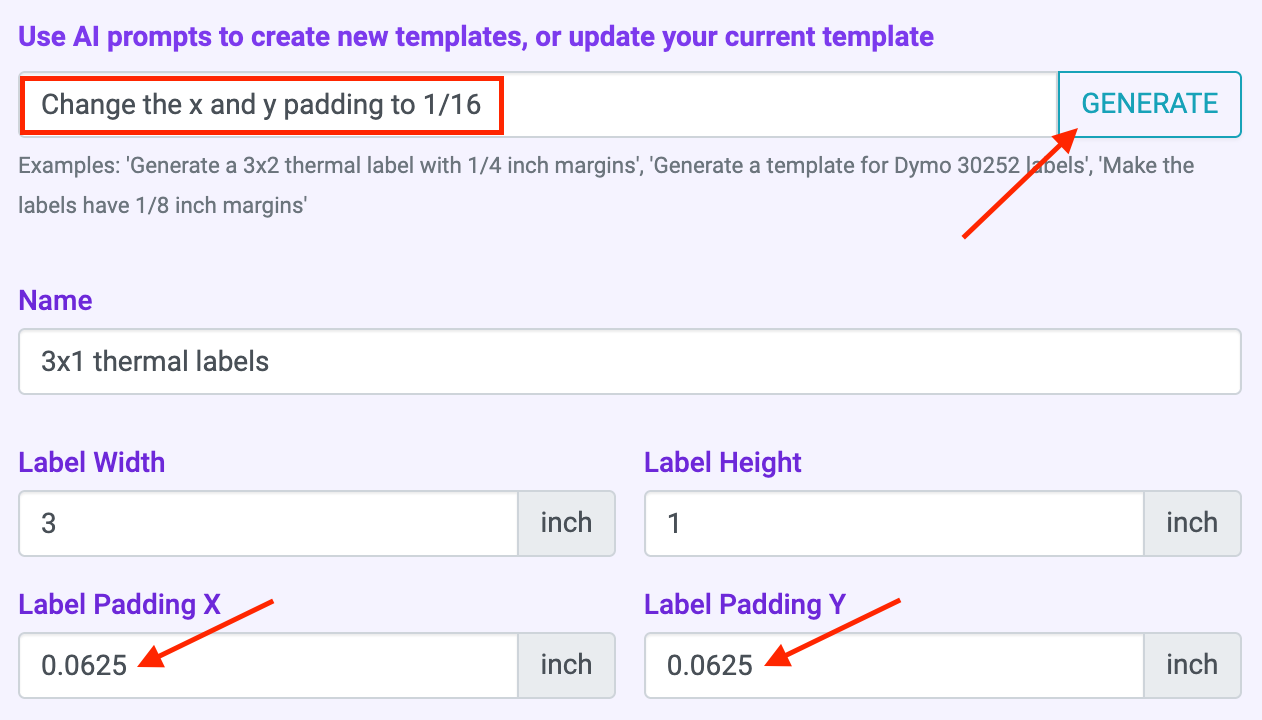
Currently, we can see that the preselected label padding is 0.125 inch (or 1/8 inch). We'd like to use a bit more space, so let's change it to .0625 inch (1/16 inch).
Uncheck the Draw borders box before continuing.
T3's AI integration can automatically make changes to your template config.
Changing a template's padding with AI
When using the T3 AI integration, be as specific as possible. The AI is given context on what your current template configuration is, as well as what the available parameters are, so it should understand values and field names you refer to even if they don't exactly match.
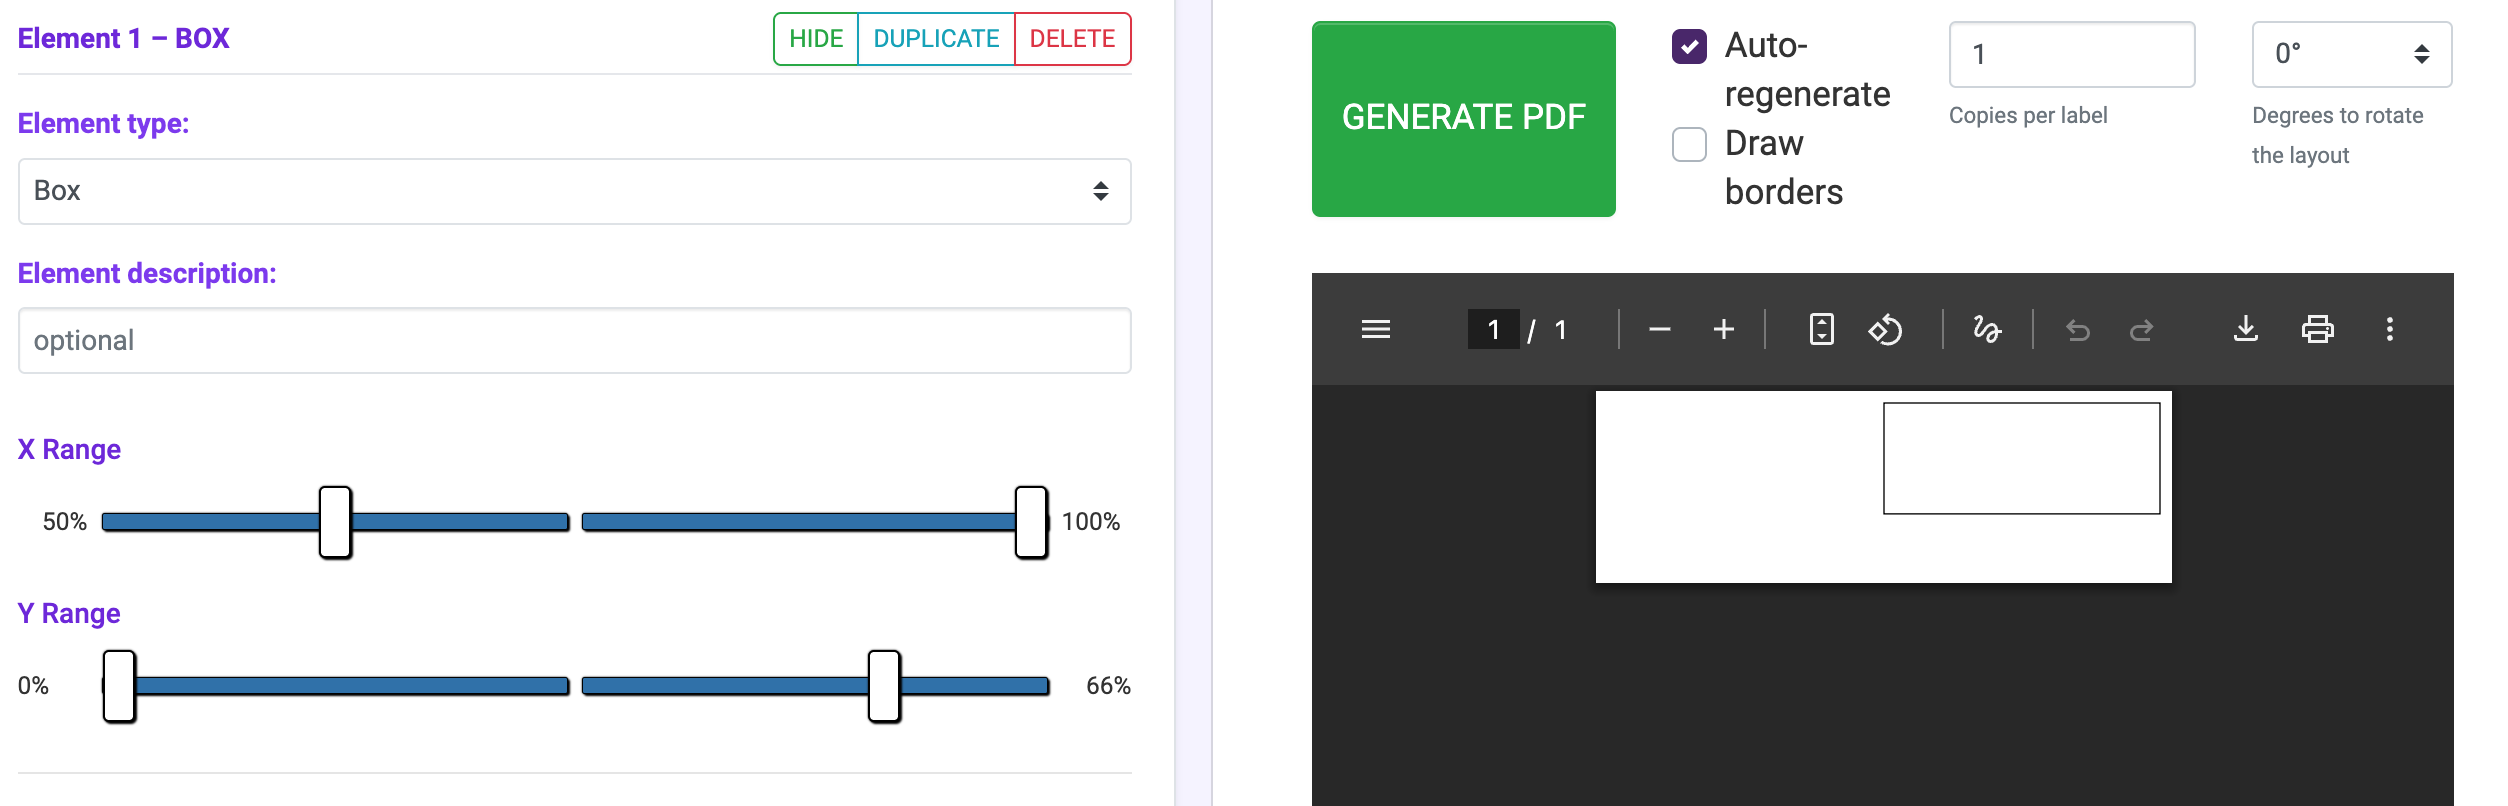
Change the box's X Range to 50% / 100%, and change Y Range to 0% / 66%
Box with range adjustments applied
An X Range of 50%-100% means that only the right 50% of the printable area is used.
A Y Range of 0%-66% means that only the top 2/3 of the printable area is used.
With these sliders, you can make a layout element cover any rectangle.
Layout elements are not sized by a fixed distance like "1 inch", but by percentage of total printable width and height. This allows the layout to shrink and grow to fit the template. If you have a 3x1 template and decide it's too small, you can just switch over to a 4x2 template, and the layout will automatically grow to fill that space.
Let's add a text element at the bottom of our label.
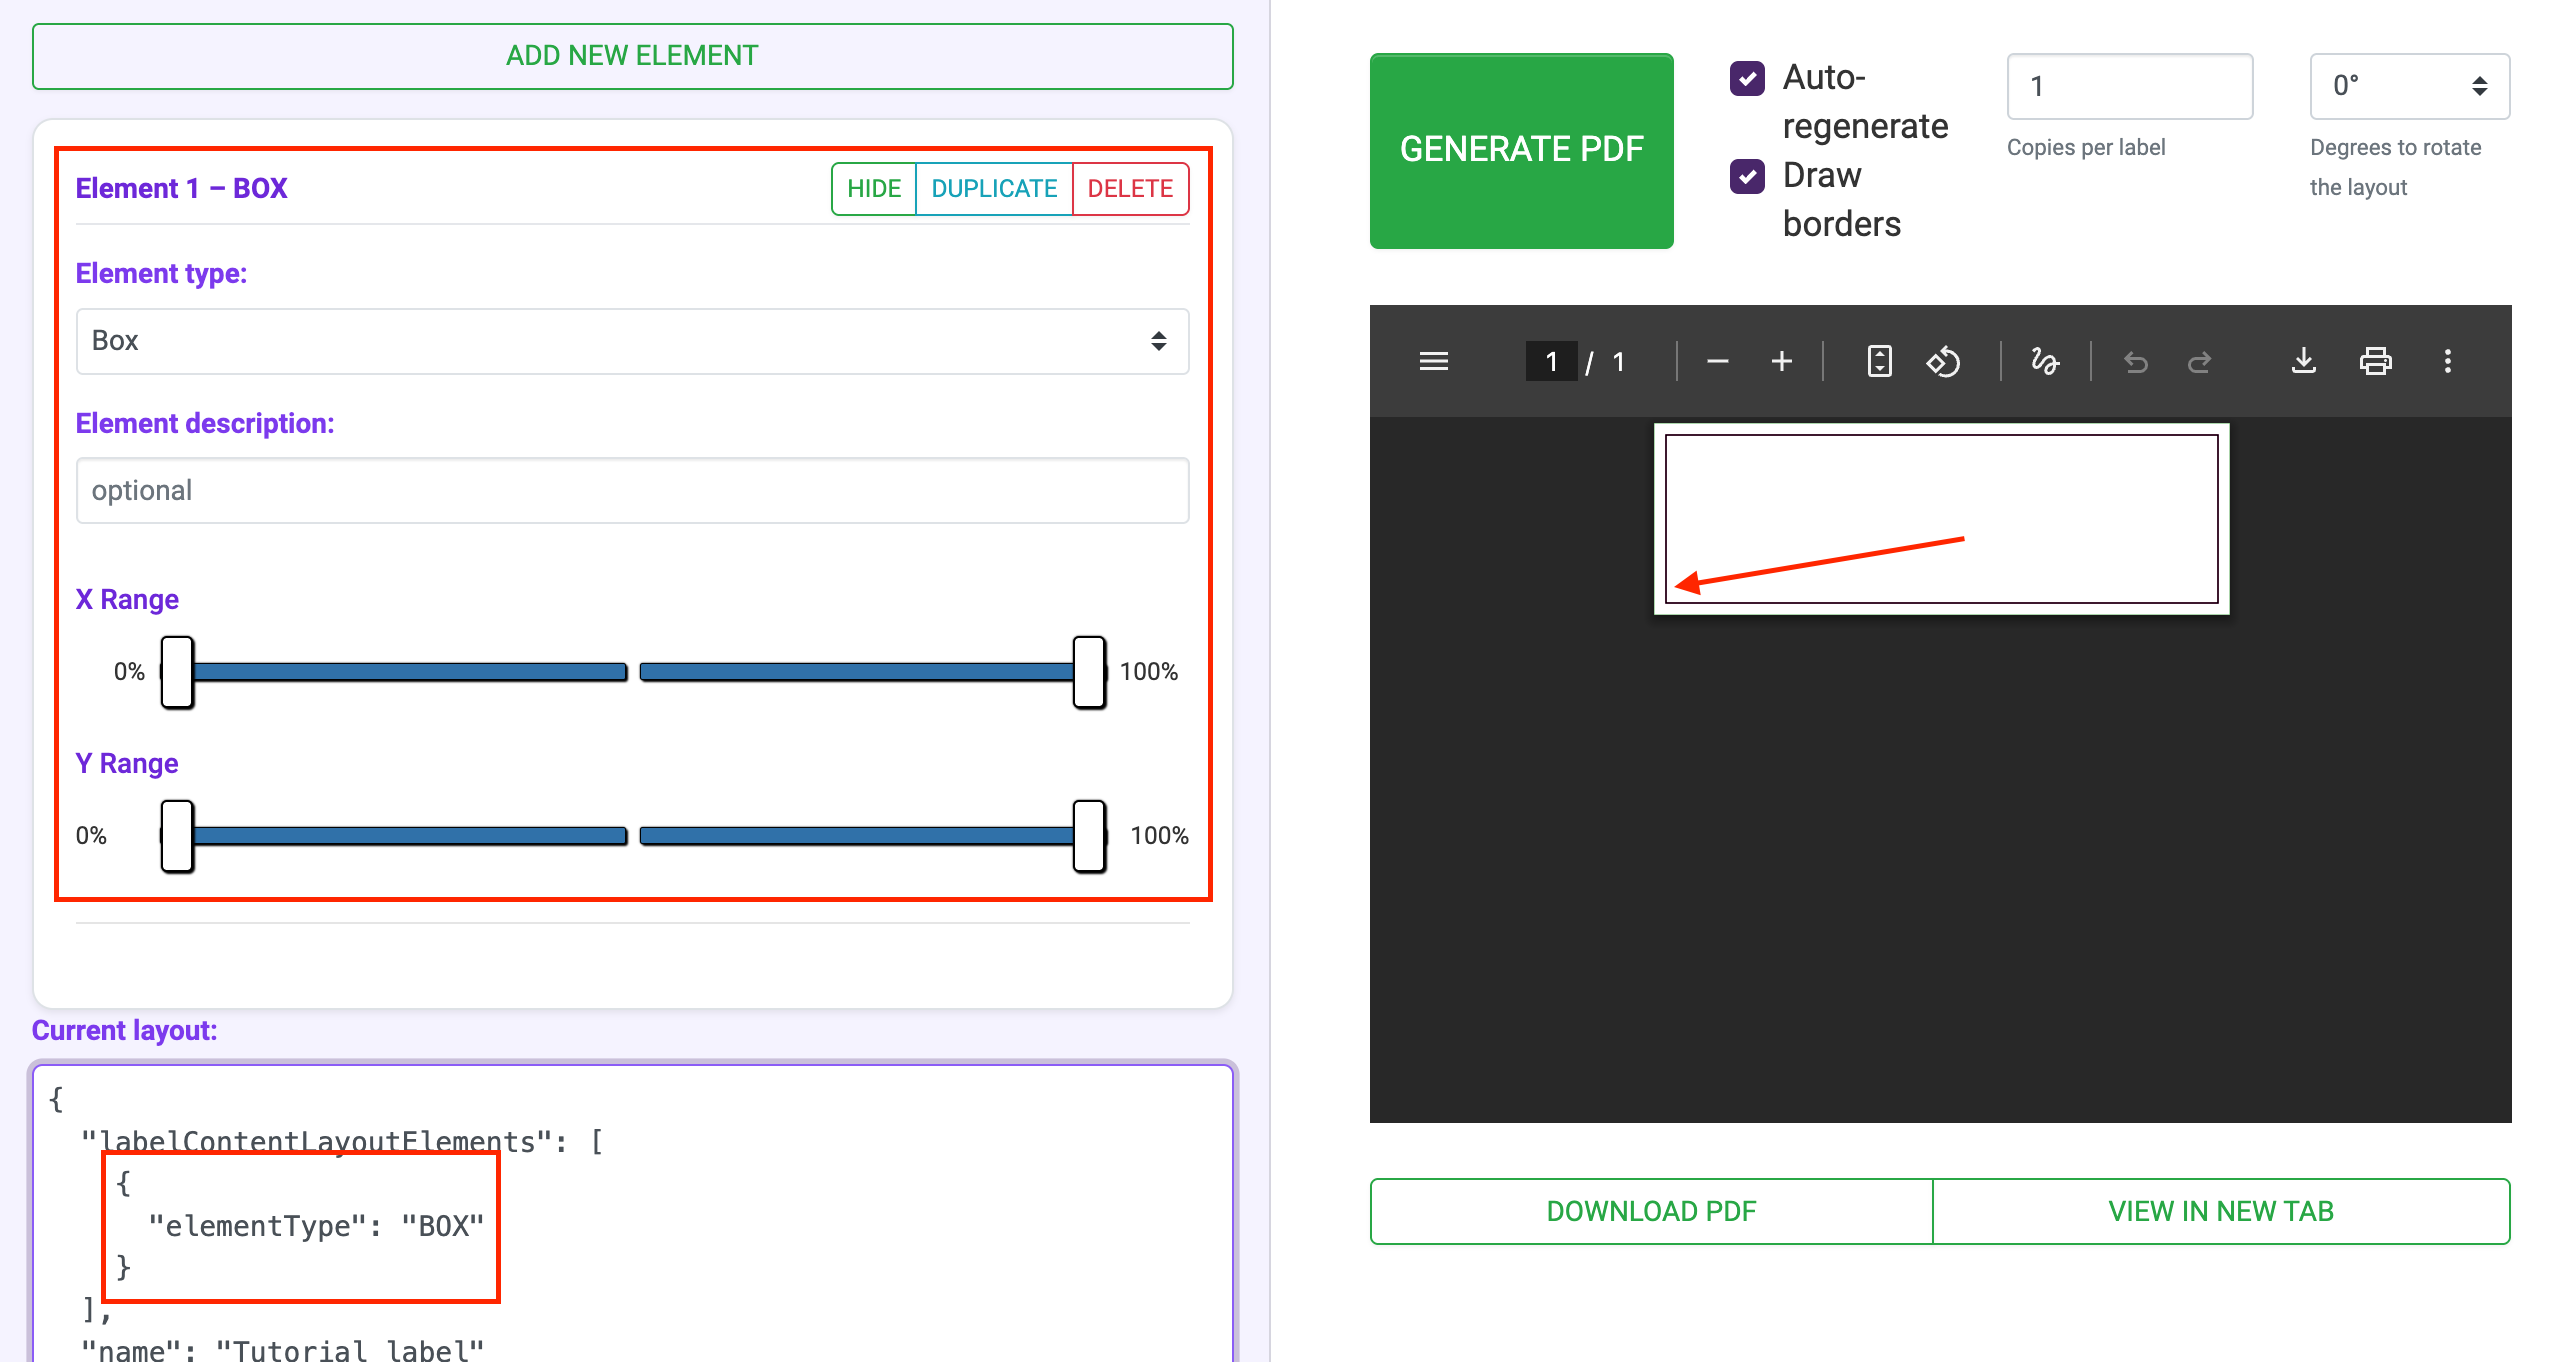
Click ADD NEW ELEMENT
Set Element type to Text
Set Y Range to 67% / 100% to occupy the bottom 33% of the printable area.
Leave X Range at 0% / 100% to occupy the full width.
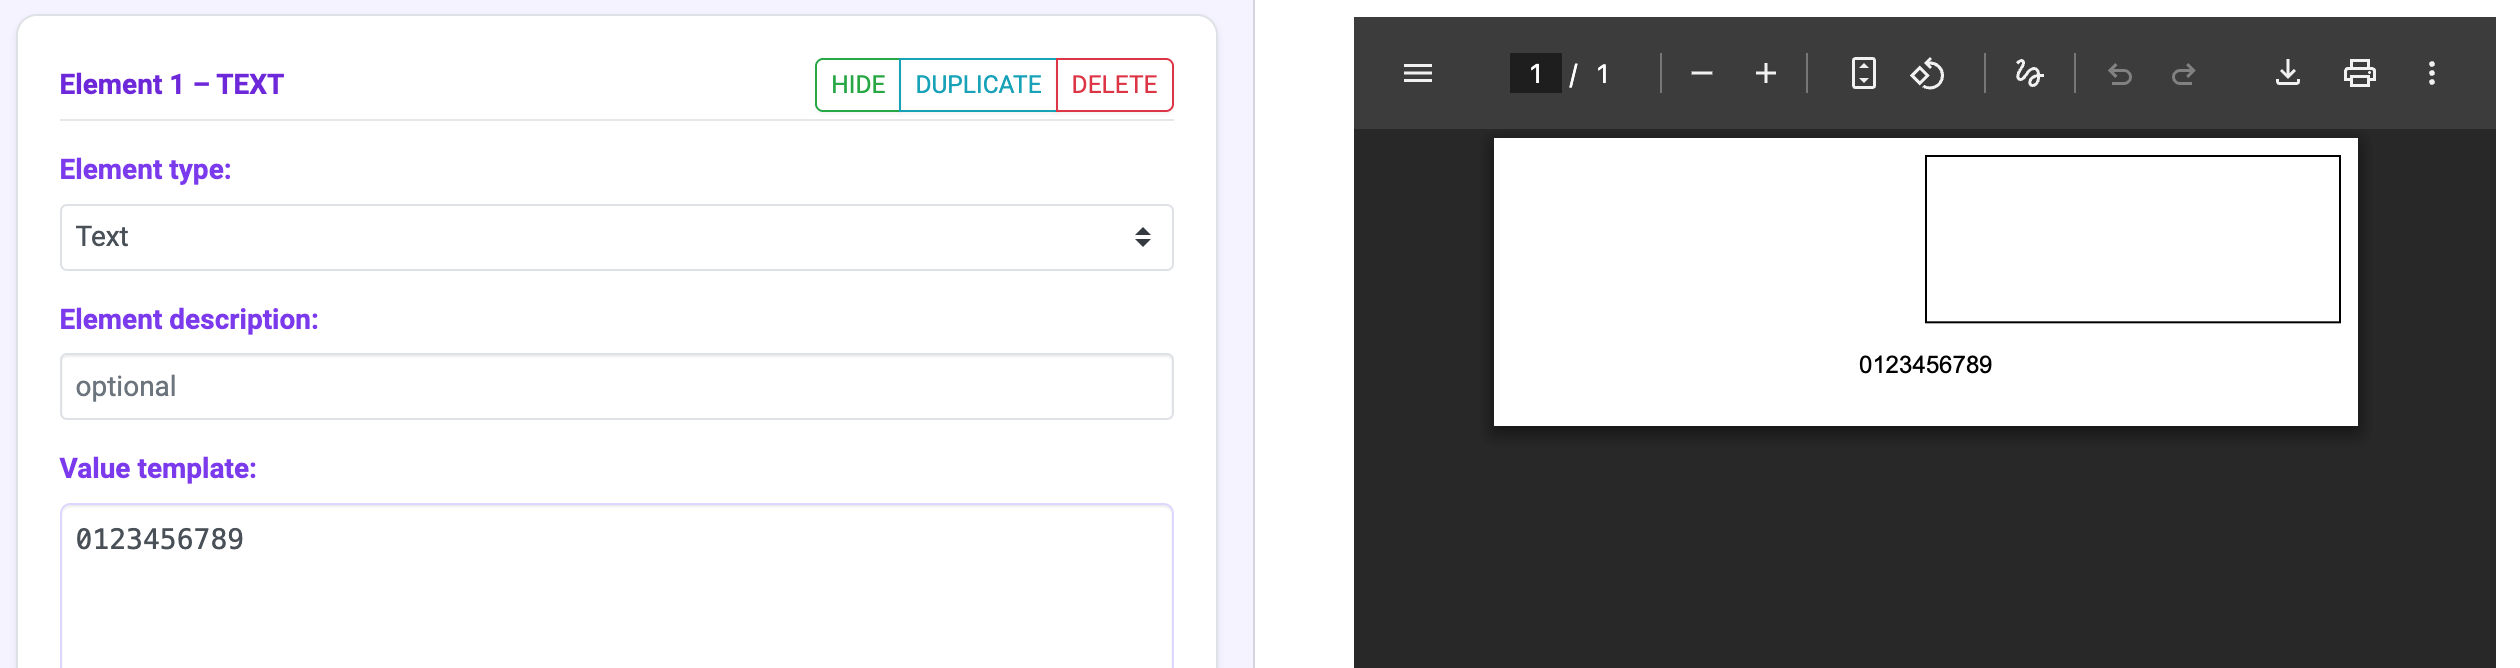
Set Value template to 0123456789 (more on this later)
After the PDF regenerates, you should see the following:
Layout with text added
"Textual" layout elements are used for displaying text on a label. There are two primary textual layout elements: - Text: used for displaying text as a wrapped paragraph - Table: used for displaying a table made up of rows/columns of cells
As with all other layout elements, textual elements are restricted to a sized rectangle container (controlled with X Range and Y Range).
To fix the text from overflowing, change the Resize Strategy to Shrink Text.
You should now see the text has been shrunk to fit inside its container:
Layout with shrink strategy applied to text
When generating a series of labels, the text content between labels will differ, but you may not want it to overflow its container.
Textual elements allow you to specify a resize strategy, which selects a strategy to be deployed when T3 detects text overflows its container.
Allow Overflow: text will overflow its container with no intervention
Shrink Text: T3 will progressively reduce font size until the text fits within its container, or until a minimum font size is reached
Truncate Text: T3 will progressively remove letters from the end of the text and append an ellipsis (...) until the text fits within its container, or until a minimum text length is reached
Note: if text does not overflow its container, T3 will leave it alone.
Click the Label Data tab to reveal the label data source tab.
In T3, printing labels involves printing a list of data entries. It could be a list of package data, or a list of empty objects containing nothing at all.
Sometimes the data list is a list with only one data entry. You might use this if you only want to print a single label.
Sometimes the data list entries are empty. You might use this if all the labels are exactly the same.
These are all valid in T3, as long as it is a list of data entries.
When you clicked START FRESH, it set the label data to the following:
[{}]
This is an example of a single empty data entry. T3 understands that this single empty data entry corresponds to one empty label.
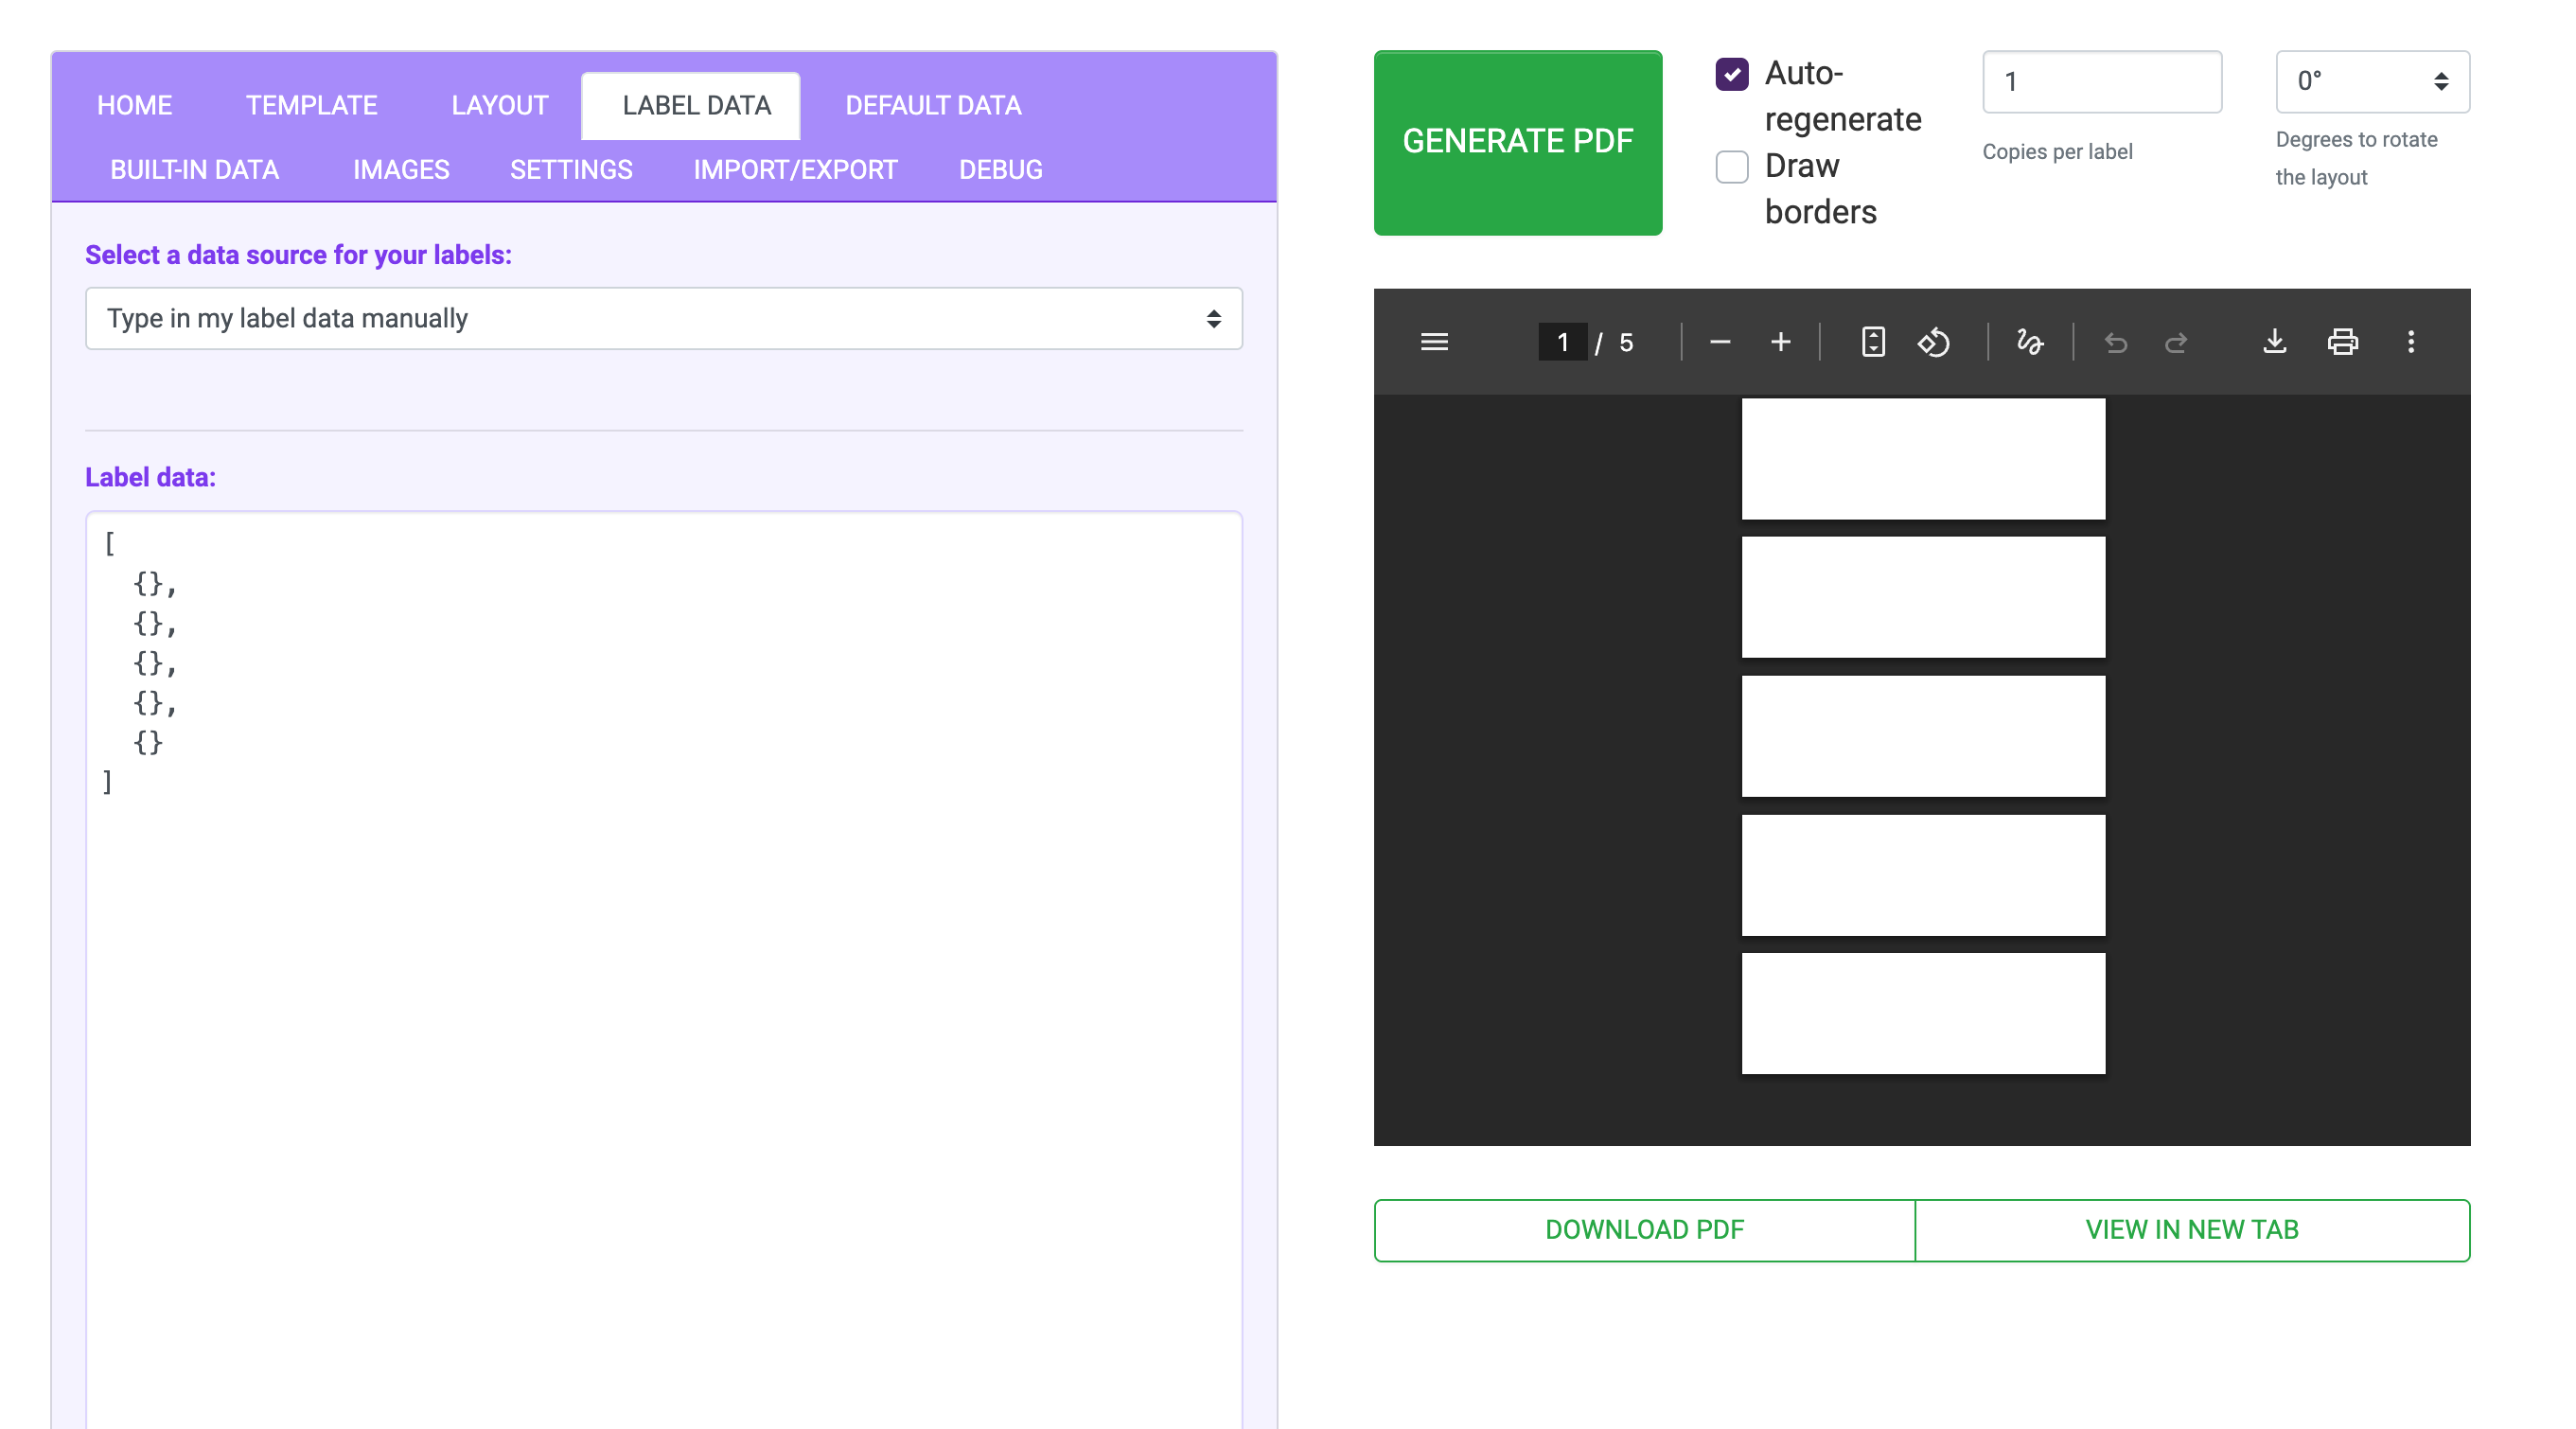
If you wanted five empty labels, you'd use five empty data entries:
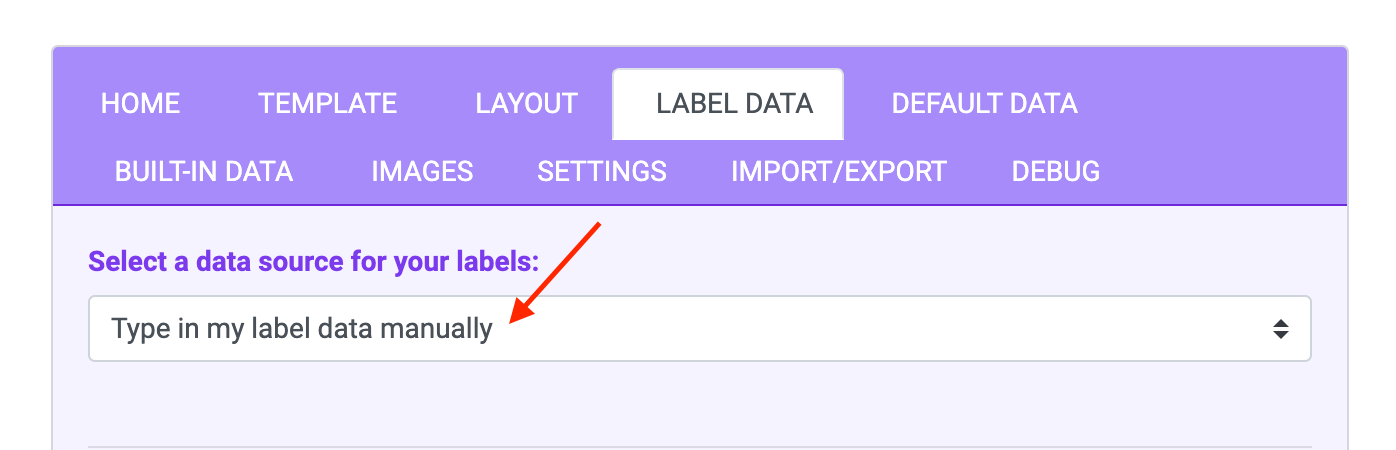
In the Label Data tab, there's a dropdown for data sources:
Label data source selector
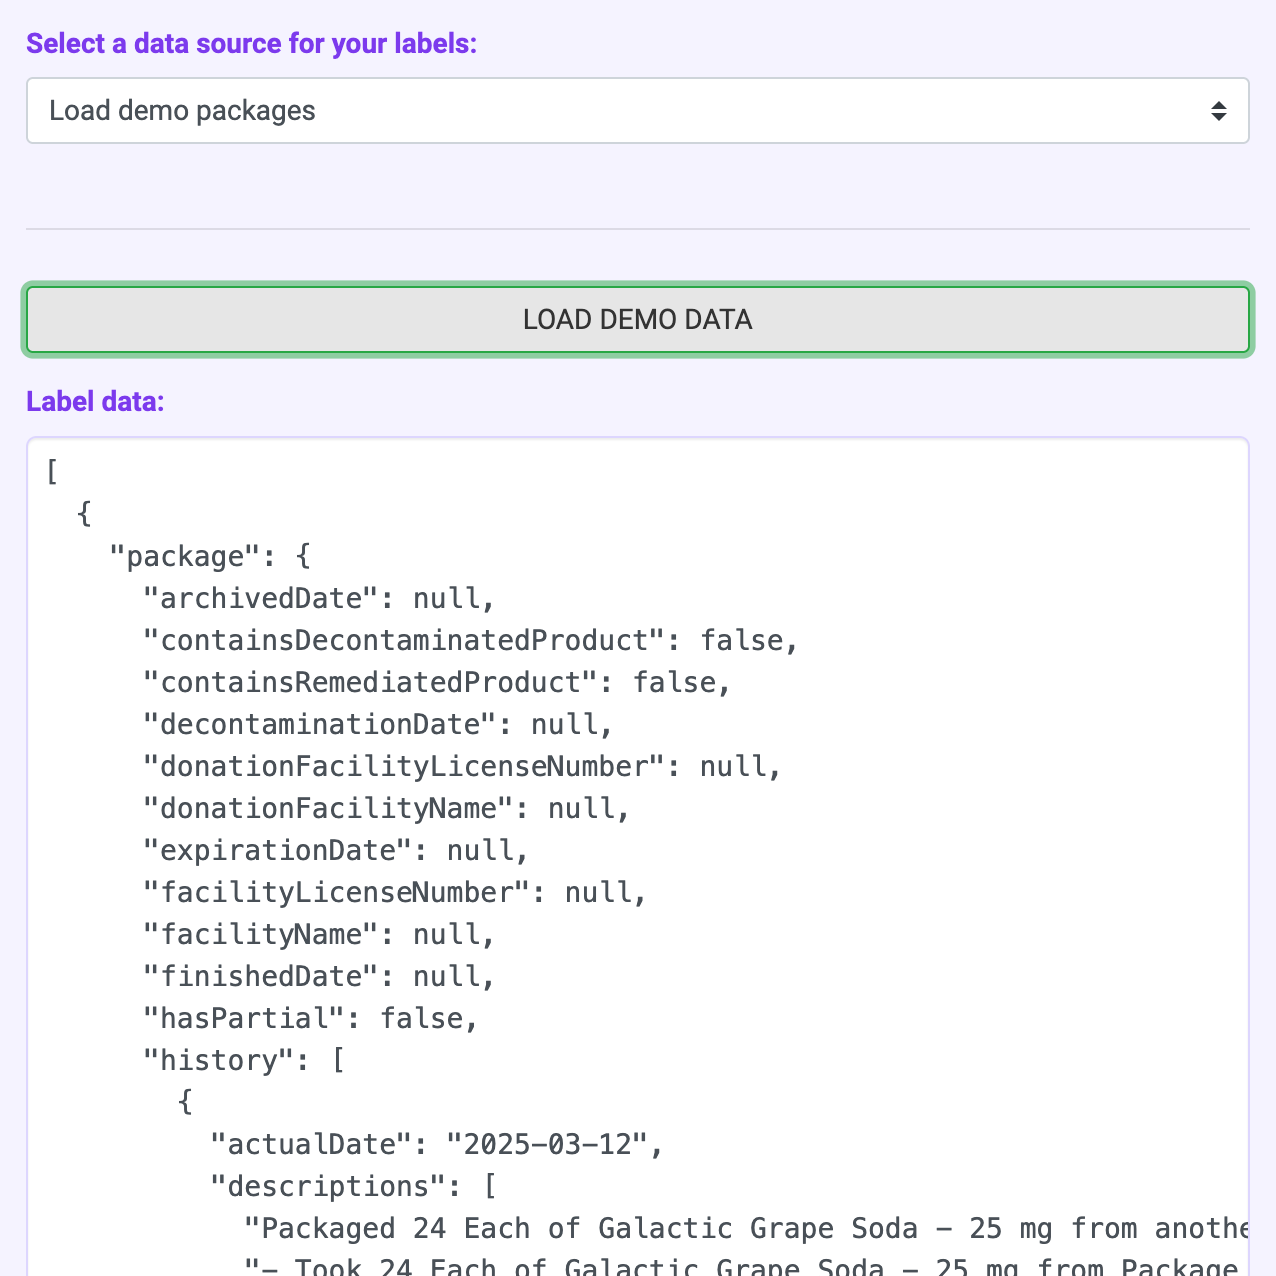
For this tutorial, we'll use the demo packages. Select Load demo packages from the data source dropdown, and then click LOAD DEMO DATA. The demo package data will populate below it after a moment.
Populated demo package data
This data source loads 10 demo packages into your data list.
After the PDF regenerates, you'll notice there are now 10 identical copies of your label (one for each data list entry).
Data sources are the different ways you can populate your data list.
Examples:
Manual data entry
Load data from a CSV
Use demo data.
Load data collections directly from Metrc (T3+ only).
Let's display each demo package's tag number on the corresponding label.
Return to the Layout tab and find the Text element we created, which currently displays 0123456789 on all labels - delete this.
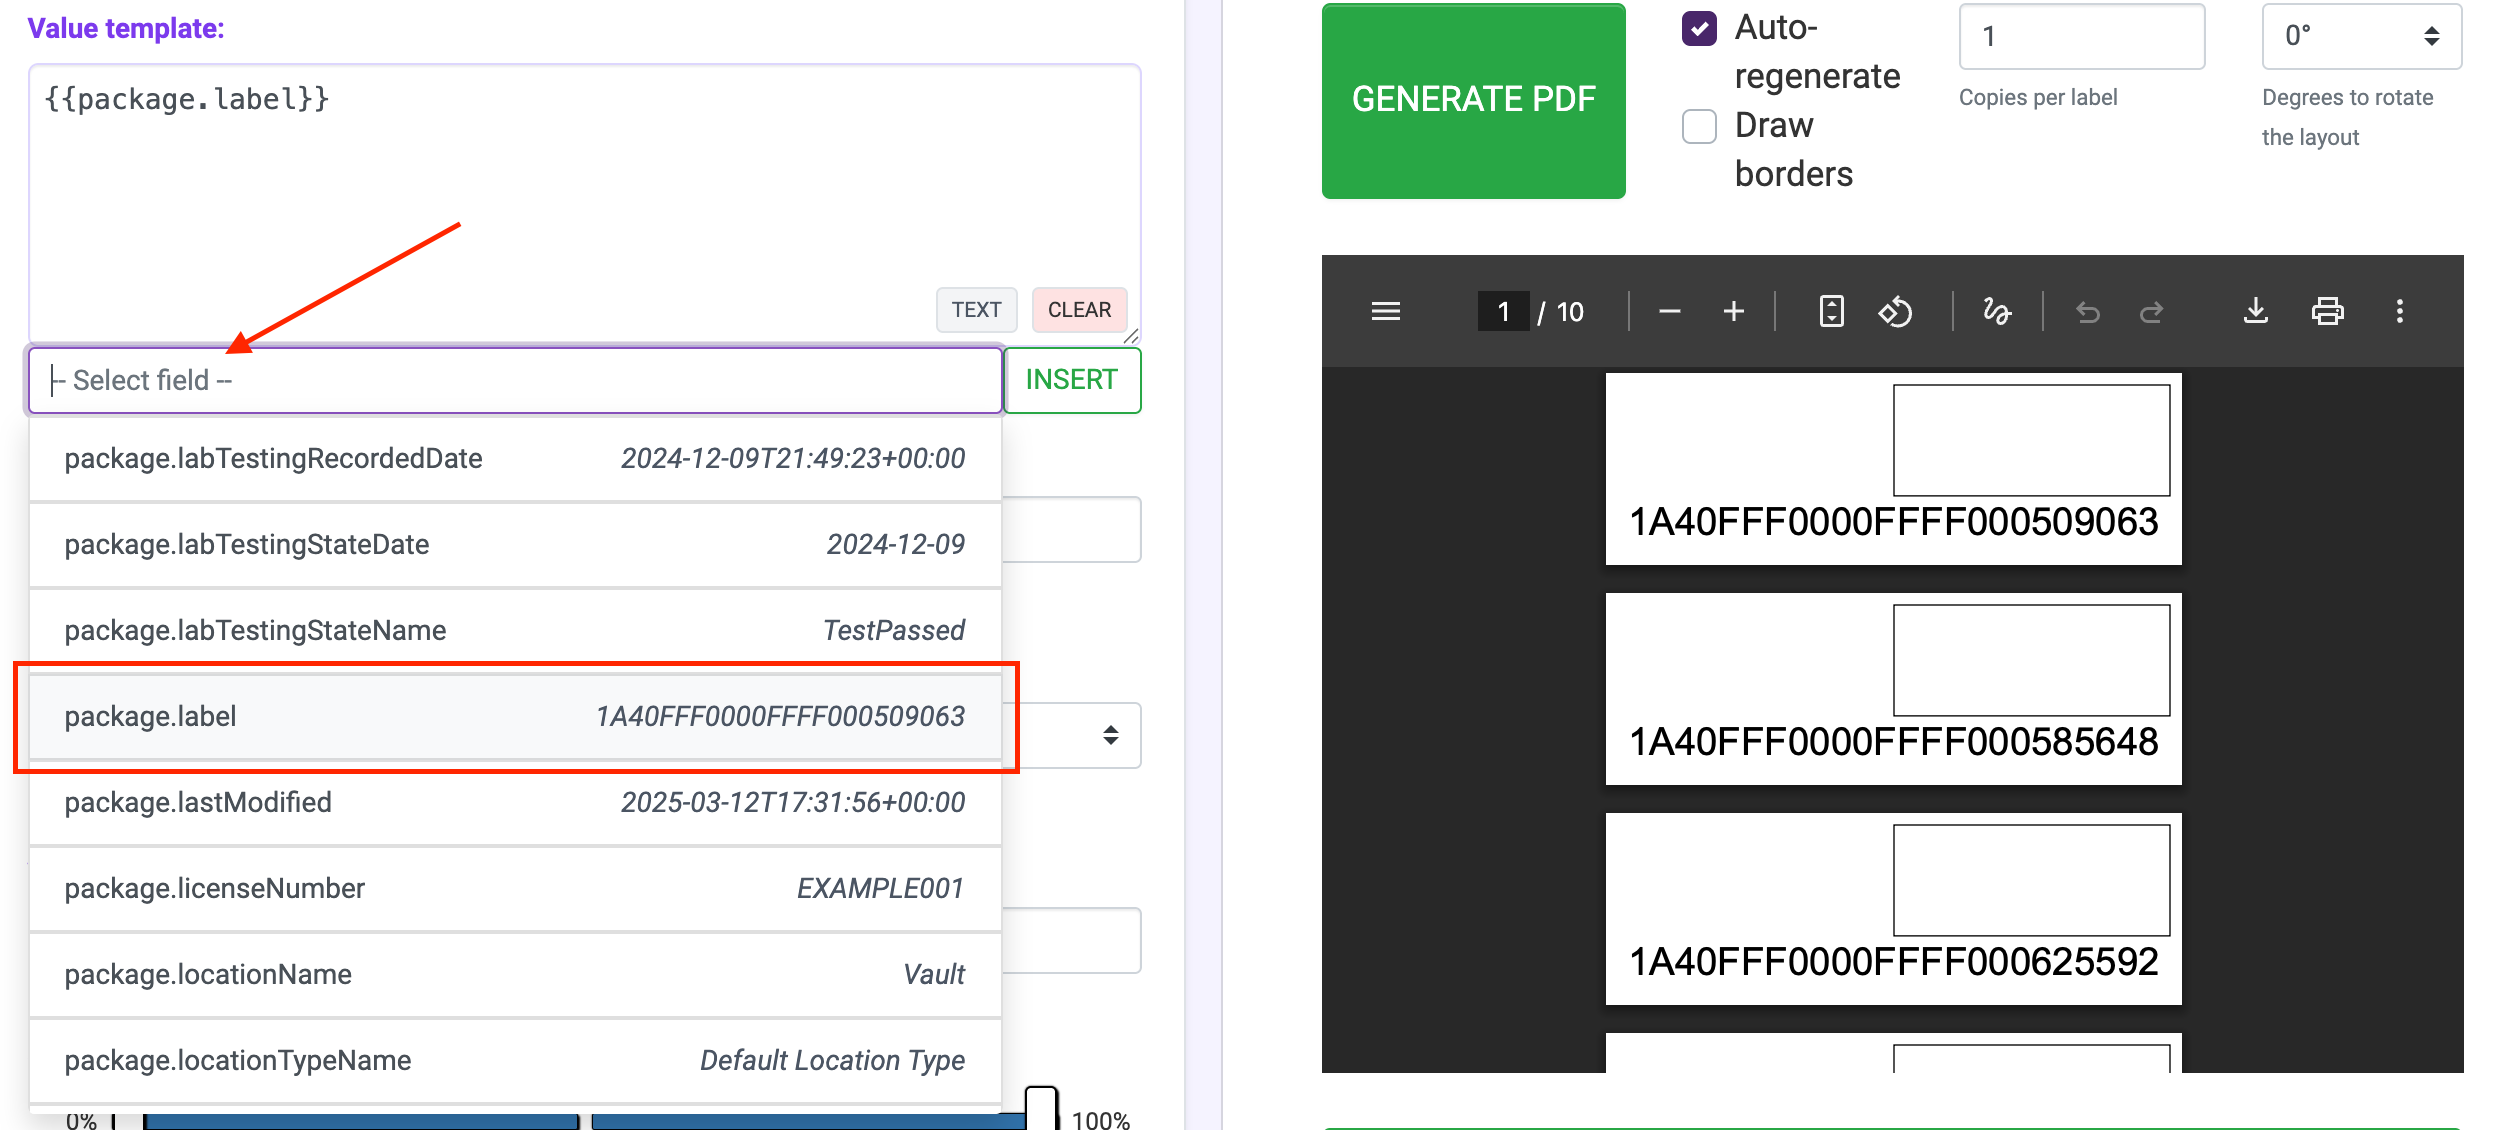
A much simpler way of adding this value is to use the field lookup. The autocomplete field below the Value template allows you to search for any available field names, and displays an example value on the right. Selecting a value and clicking INSERT will auto-add it to the value template with brackets pre-added.
Finding data values via field autocomplete
The label PDF will update to show each unique package label:
Populated demo package data
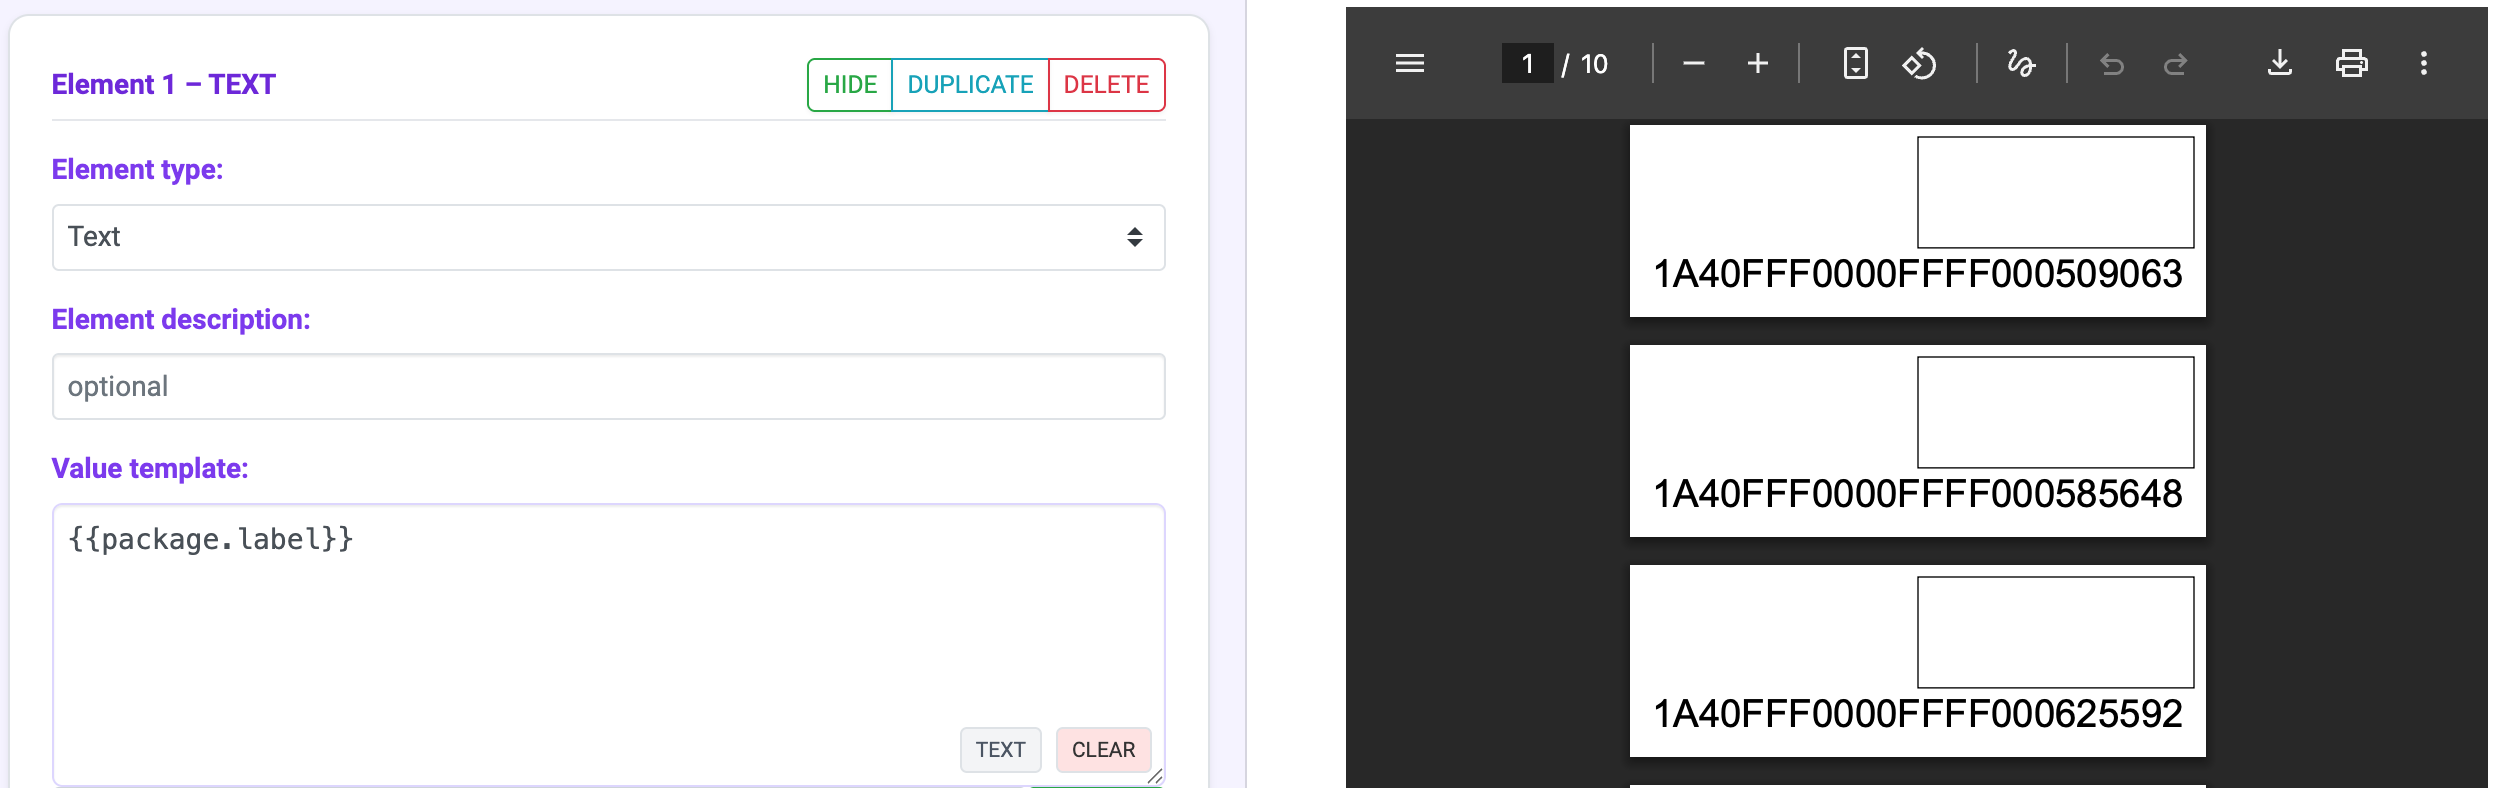
Some layout elements like Text use a value template to decide what is shown in that element.
When we entered 0123456789, this instructs T3 to show exactly that value in every label.
When we entered {{package.label}}, this instructs T3 to inject the label value in the package entry in the data list.
The {{ }} (sometimes called mustaches) tell T3 to inject a value. This injection is done via Jinja syntax.
If we look into the data list, we can see the overall structure is:
It's useful to understand how to interpret and troubleshoot T3 Label Studio errors, but this section can be skipped.
Let's force the T3 label generator to return an error to practice troubleshooting.
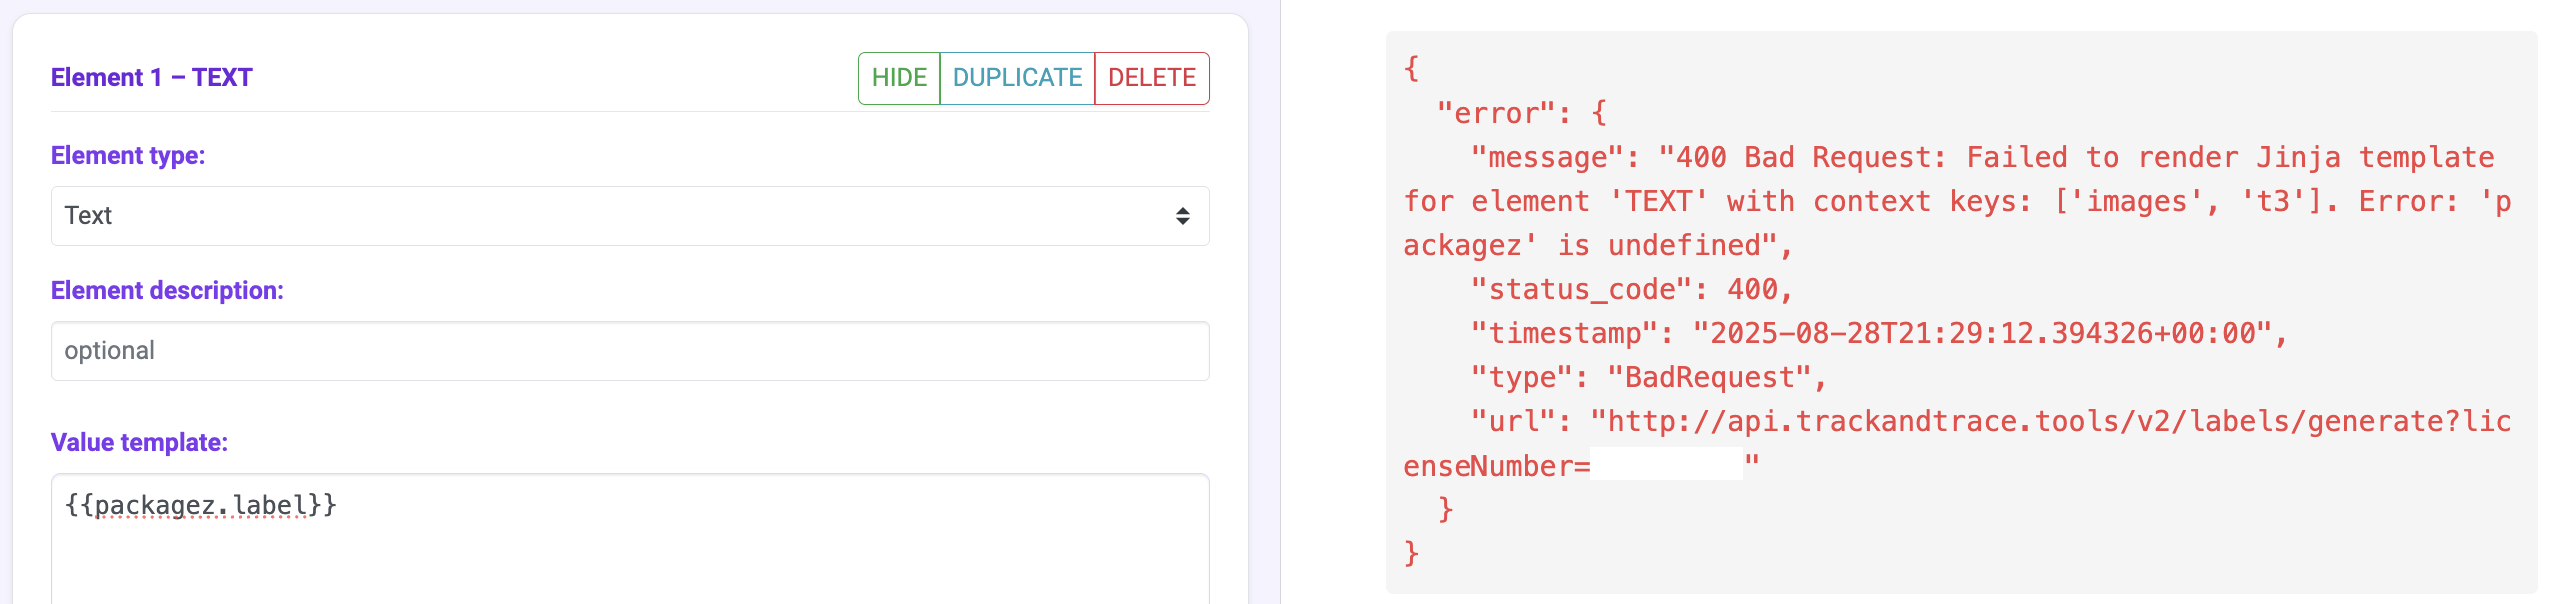
Change the Value template to an intentionally mistyped one: {{packagez.label}} to see what we get back:
T3 label error message
Your error message will look something like this:
{"error":{"message":"400 Bad Request: Failed to render Jinja template for element 'TEXT' with context keys: ['package', 'images', 't3']. Error: 'packagez' is undefined","status_code":400,"timestamp":"2025-08-28T21:29:12.394326+00:00","type":"BadRequest","url":"https://api.trackandtrace.tools/v2/labels/generate?licenseNumber=EXAMPLE0001"}}
We can see that T3 is attempting to match packagez against the available data and not finding a match:
package is our existing package
images are the images we've provided (we haven't provided any, so this is empty)
t3 is the built-in text and images that T3 provides for us
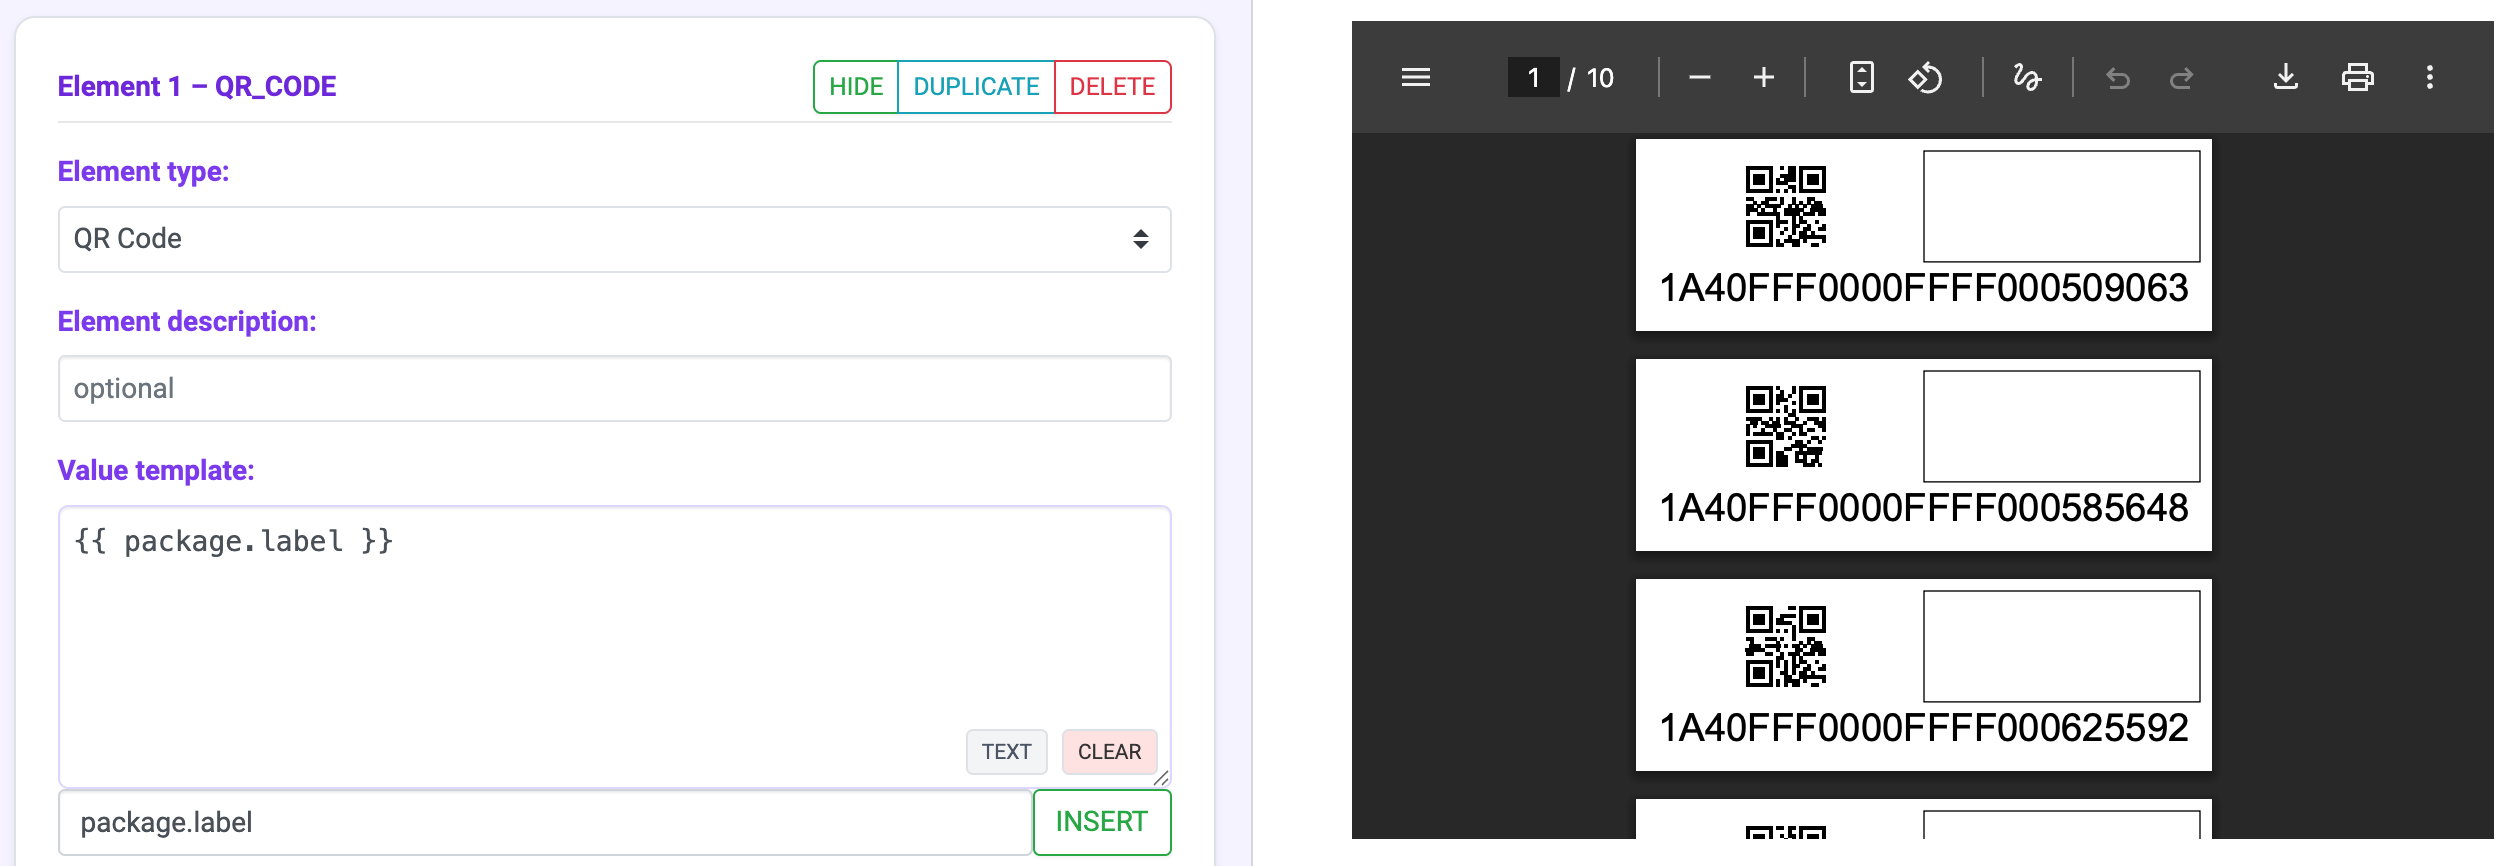
When the PDF regenerates, you should see a QR code in the top-left of your label. Use your phone to scan this QR code, you should see the package label appear.